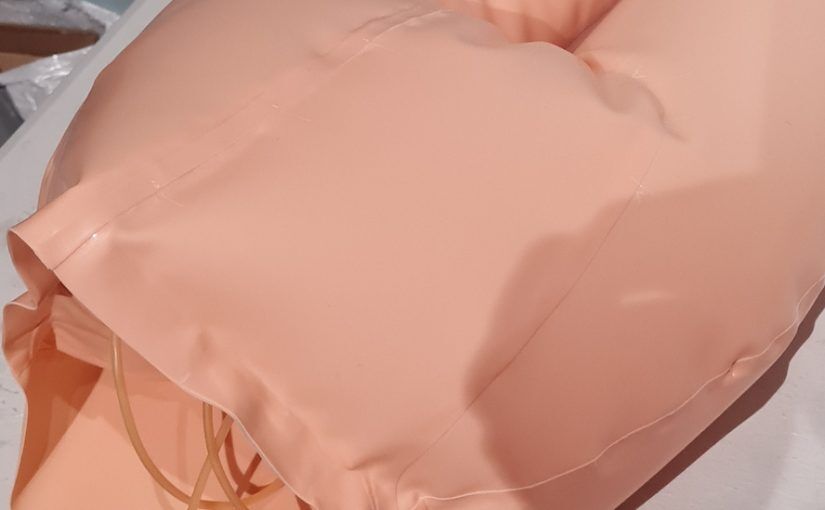
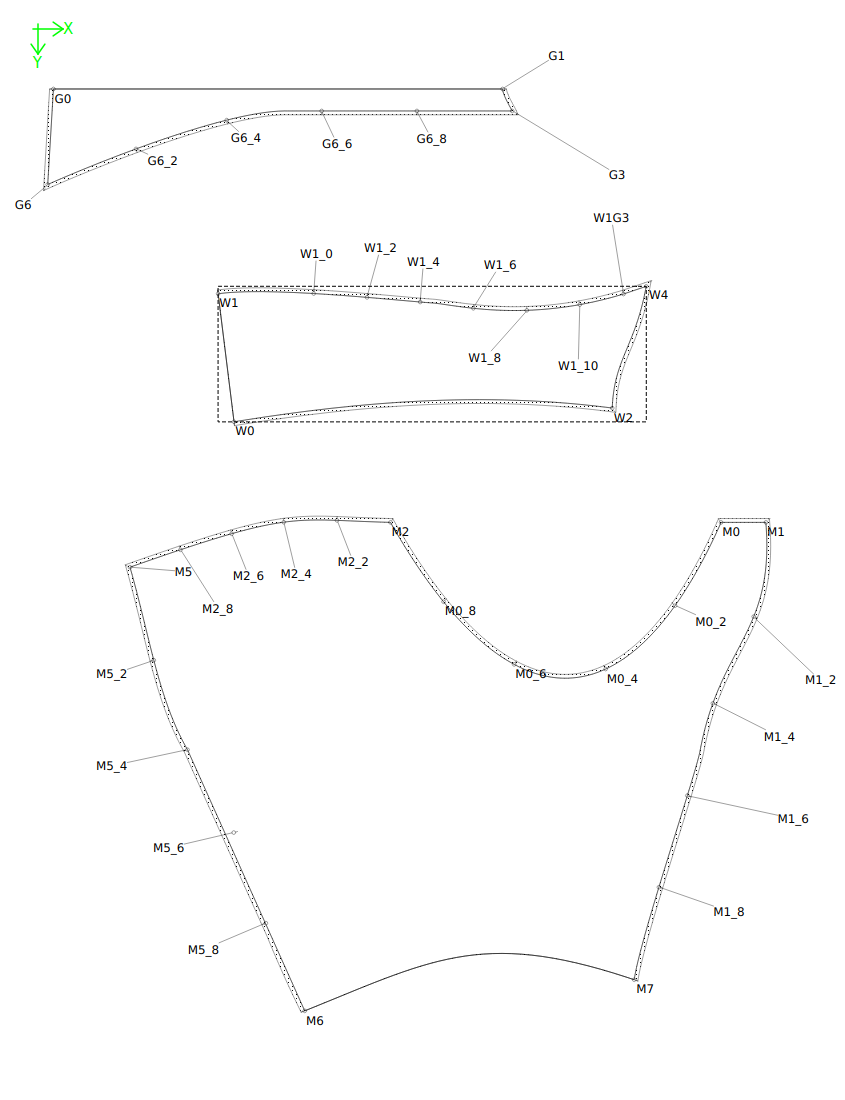
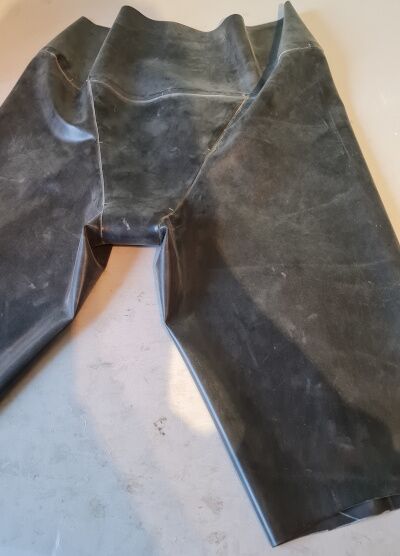
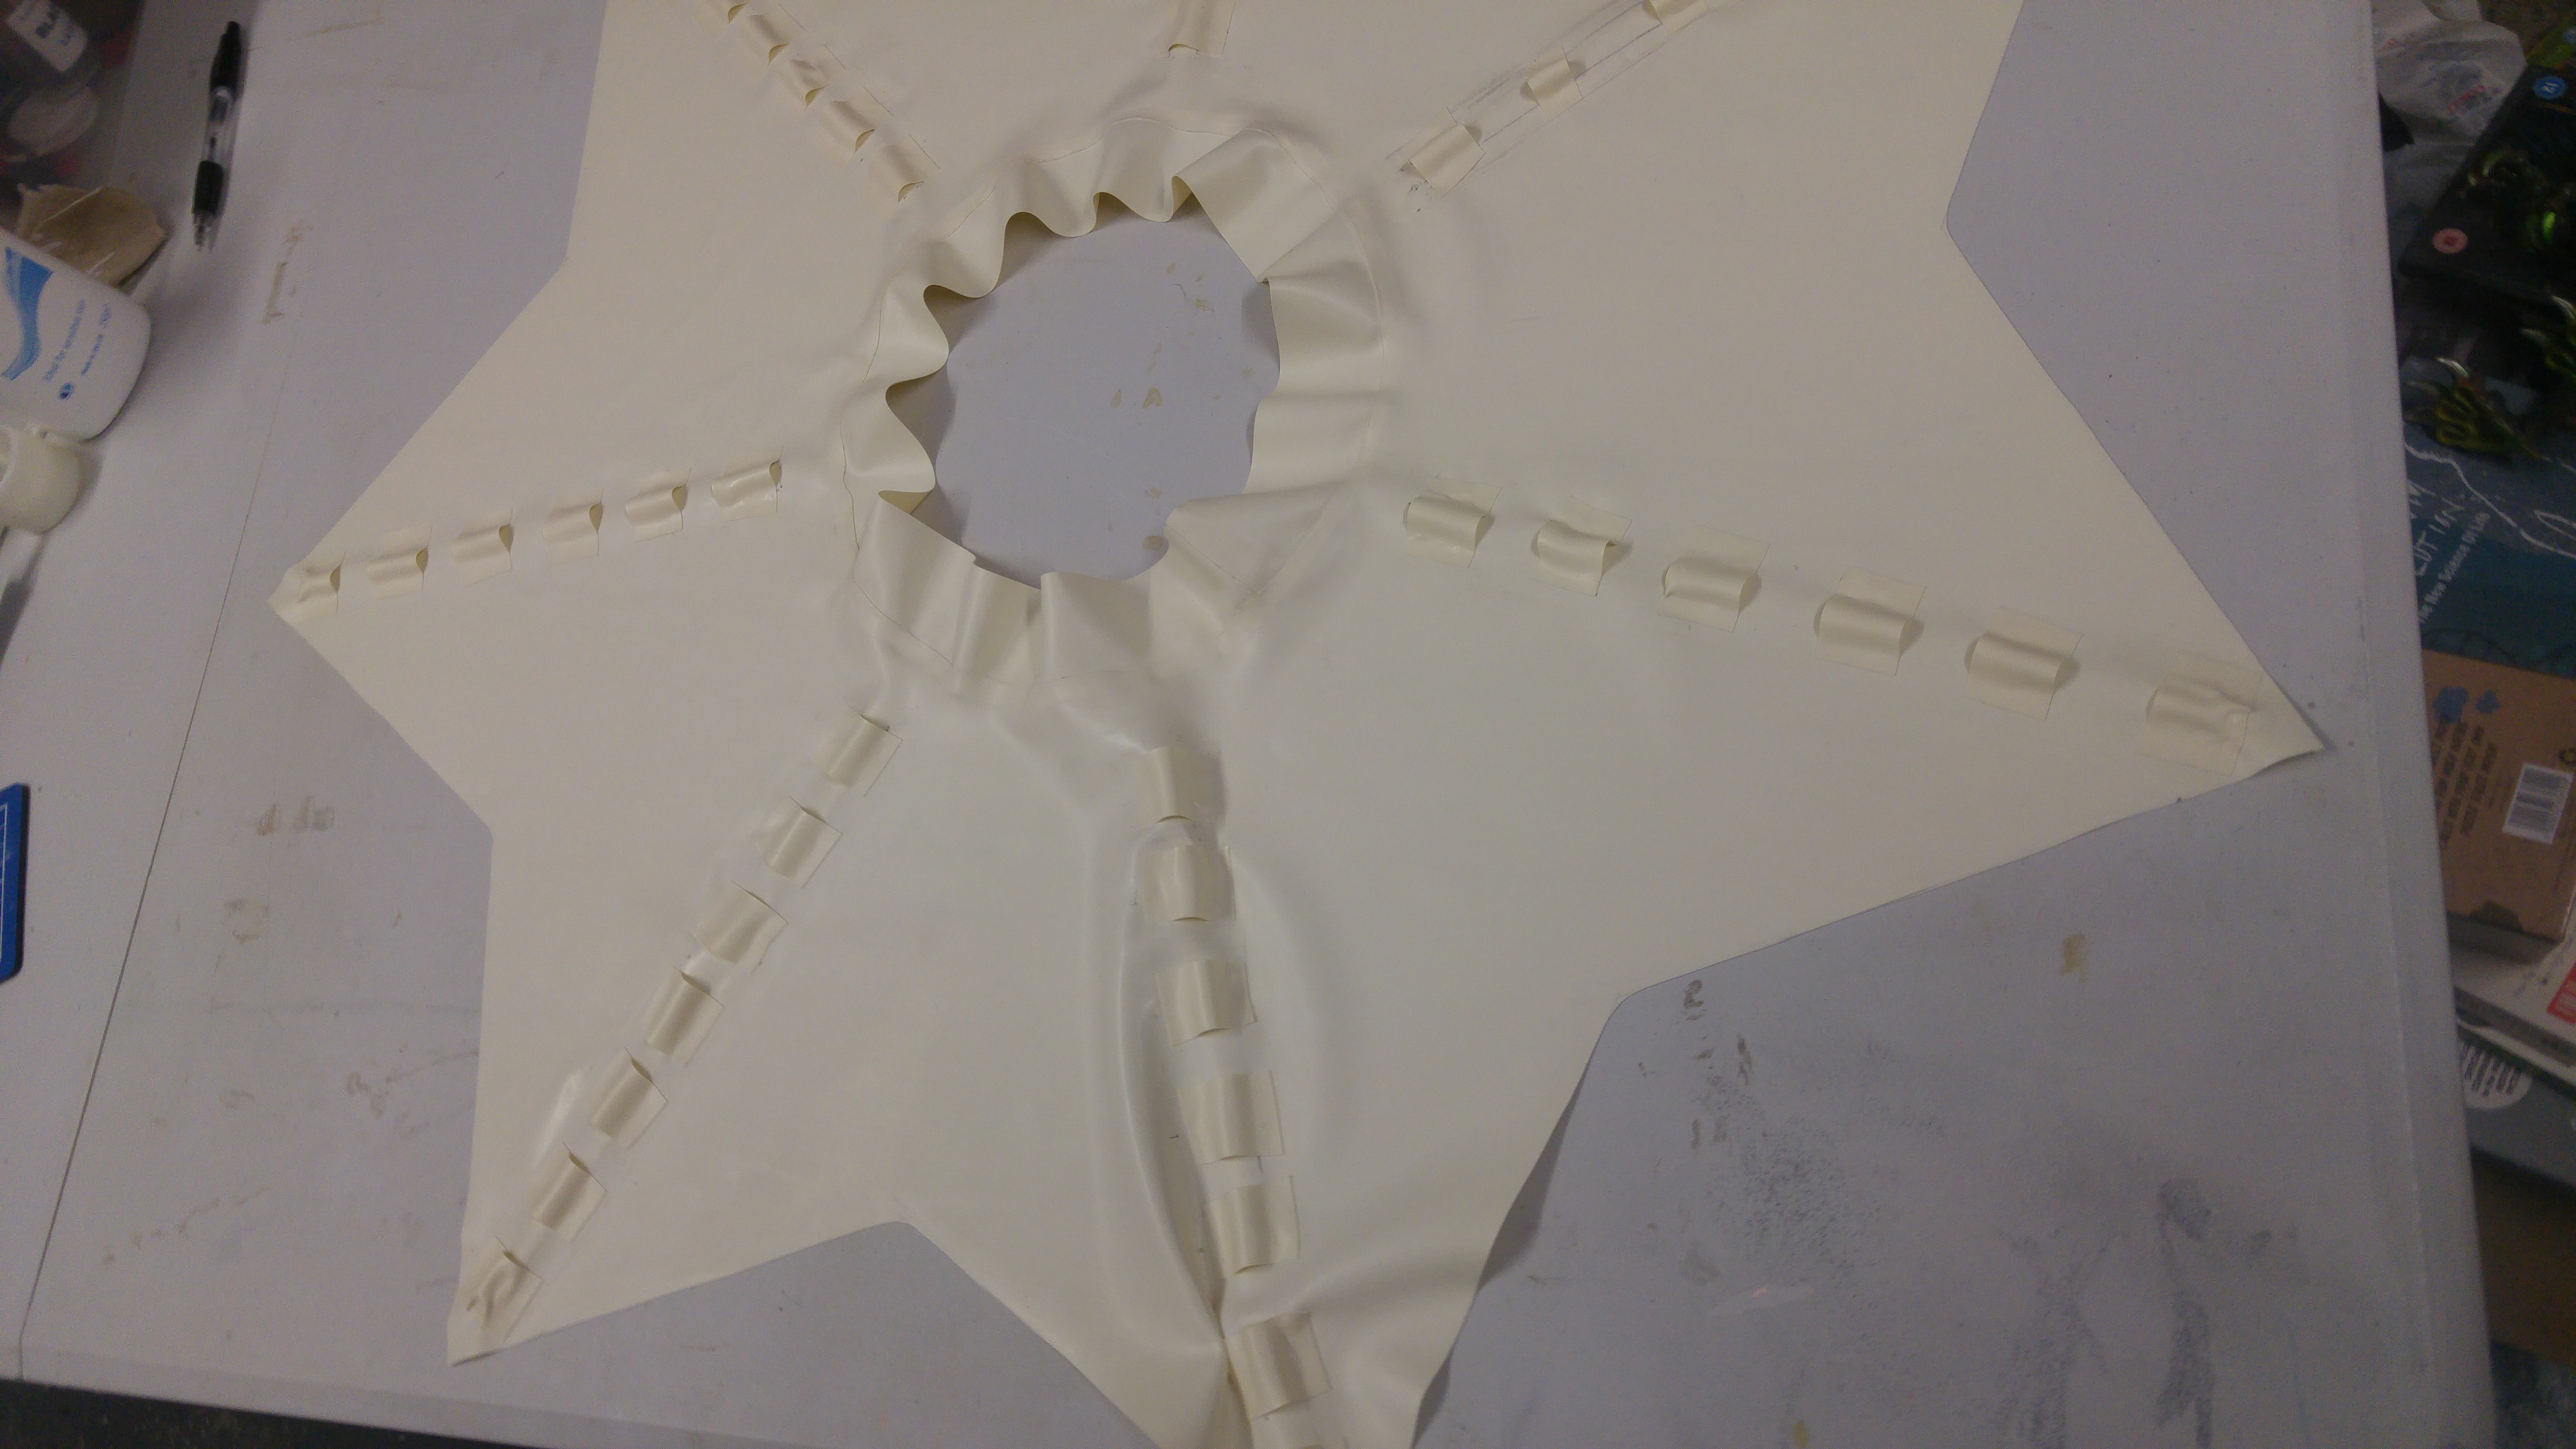
Make your own latex inflatable hip shorts adjusting the pattern provided with Seamly2D!
It may seem daunting but it’s fairly straightforward and there are no complex tight curves. I’d say it is about as complex and about as much time (and material) as making a catsuit. What you really need is patience.
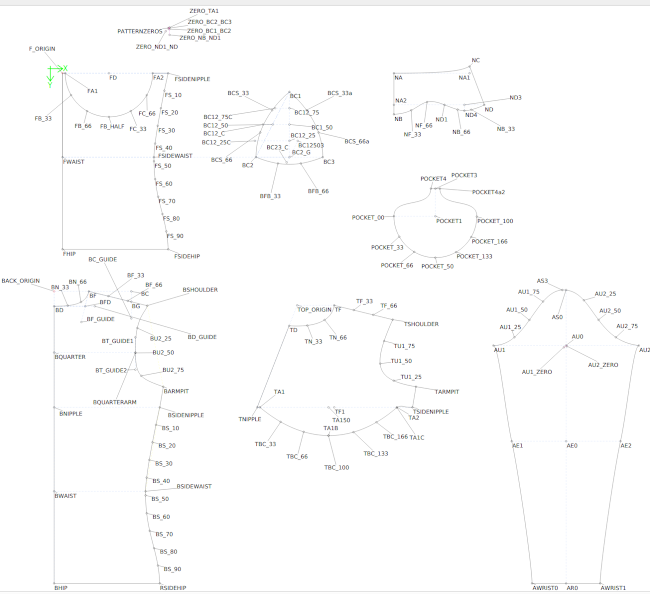
I’ve made a pattern using Seamly2D, free and open source software for pattern creating. You can enter your own measurements and with a few tweaks I explain pop out a pattern.
Full instructions on how to do this in the attached PDF file you can download, along with the Seamly files you’ll need.
I’ve been searching for the perfect latex catsuit that has pockets to hold silicone breast forms. You can buy catsuits like this from a variety of sellers but they all have their disadvantages. Some have just pockets on the back of the latex which have trouble with the weight of large forms. Some don’t do made to measure or have fixed breast form pocket sizes. Others take many months for delivery and returns are impossible. Some are expensive (and more expensive suits are not always the best).
So can we come up with a design that takes the all the best design ideas, make it fairly simple to pattern and construct, and then make the pattern free and available for all?
I’ve made a pattern using Seamly2D, free and open source software for pattern creating. You can enter your own measurements and with a few tweaks I explain pop out a pattern.
Full instructions on how to do this in the attached PDF file you can download, along with the Seamly files you’ll need.
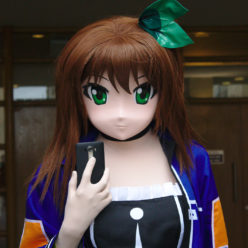
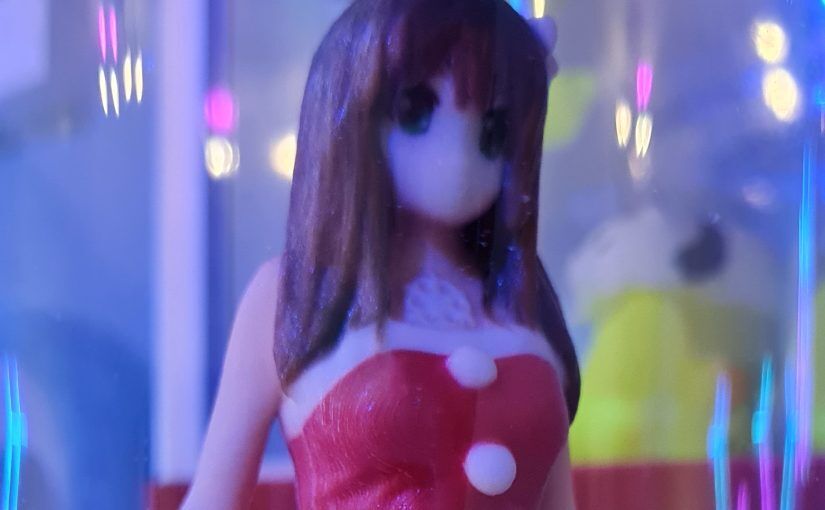
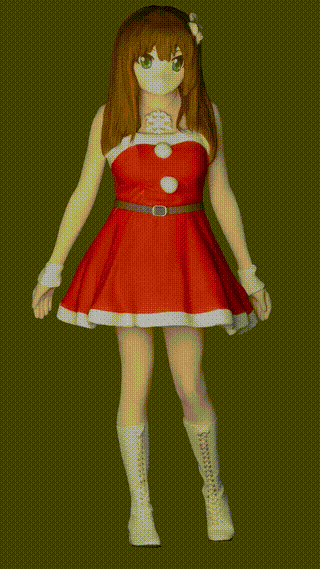
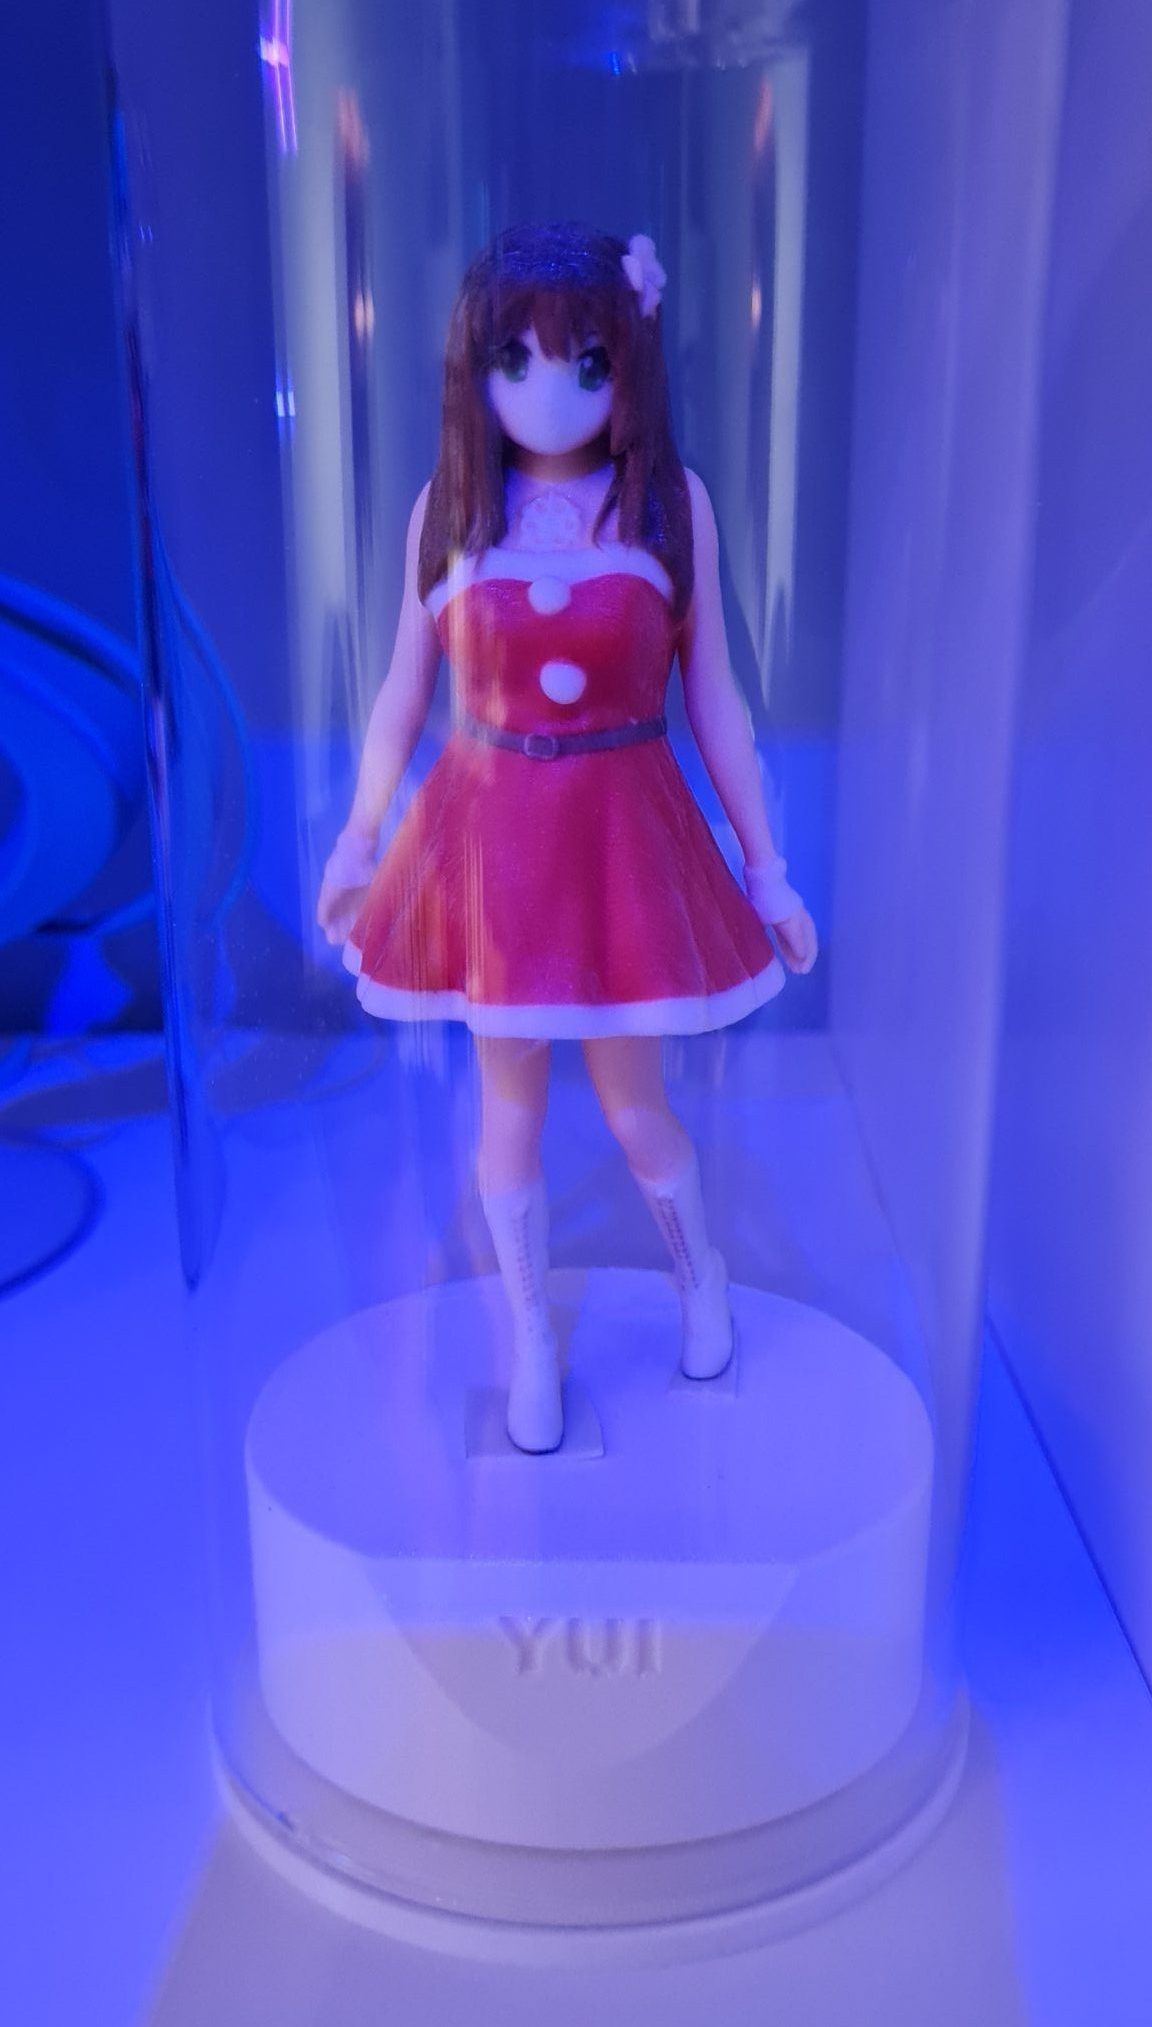
Back at MCM ComicCon in Birmingham last year a company, Milkestones3D has a 3D scanning booth. You stand inside the scanner, it takes hundreds of pictures, and they use them to create a 3D gif. As a gift Jade bought a hires model and 5 inch high Yui figure which was delivered just before Christmas. The detail is amazing and it’s full colour! I made this gif from the scan.
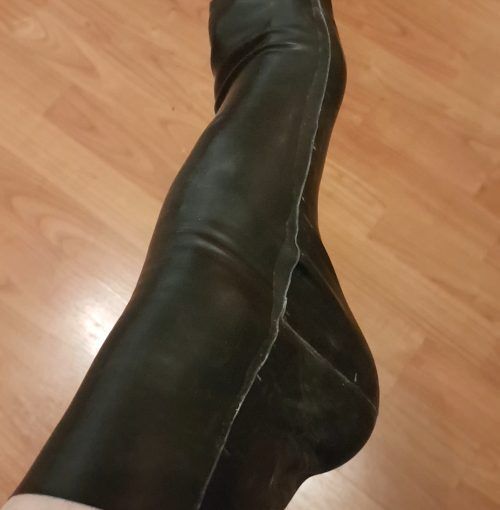
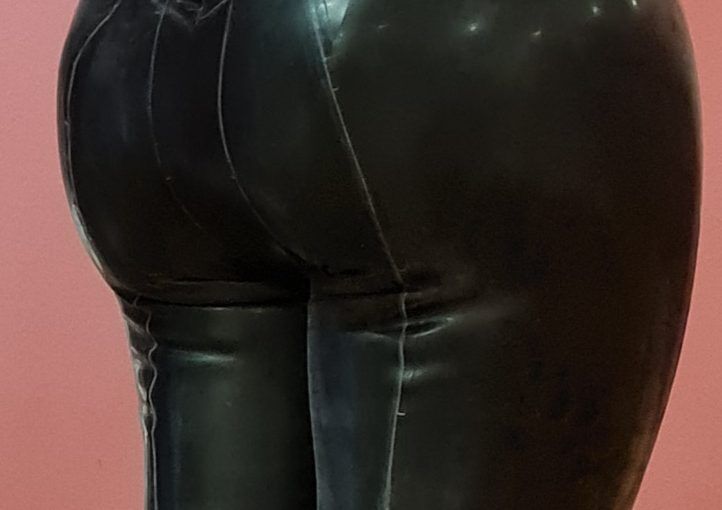
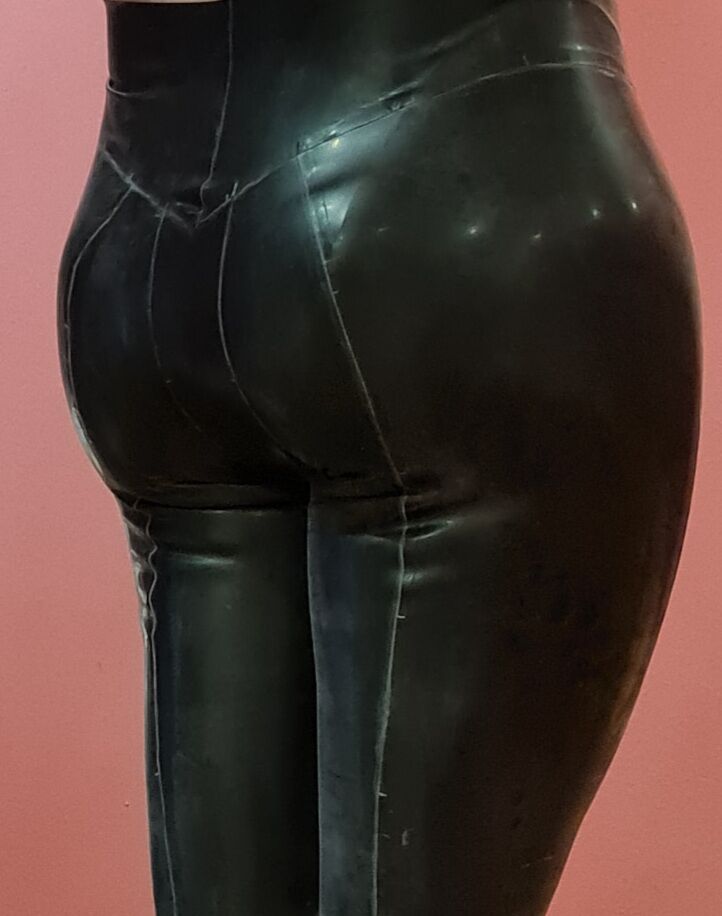
I’ve been searching for the perfect latex leggings. My ideal leggings will, in a single item
Hold in silicone hip pads
Act as a Gaff, but allow toilet breaks
Hold in foam butt pads
Give a nice butt definition
So can we come up with a design like that? This is my first attempt. It’s based on a duct-tape pattern but I’ve modified the pattern so it should be able to scale to measurements. It’s not as refined a work as my pocket-top, so you’ll need to do some work to get a nice pattern out of this.
I used
* 0.4mm latex in black for the main parts
* 1mm latex in black for the gaff part
* A random zip I had handy
For the prototype I only made the leggings extend to just above the knee (because I ran out of black .4mm latex). A future prototype will include full legs too.
I’m probably 70% happy with the design as it stands; it’s better than anything else I’ve owned. I do feel we can make it even better though.
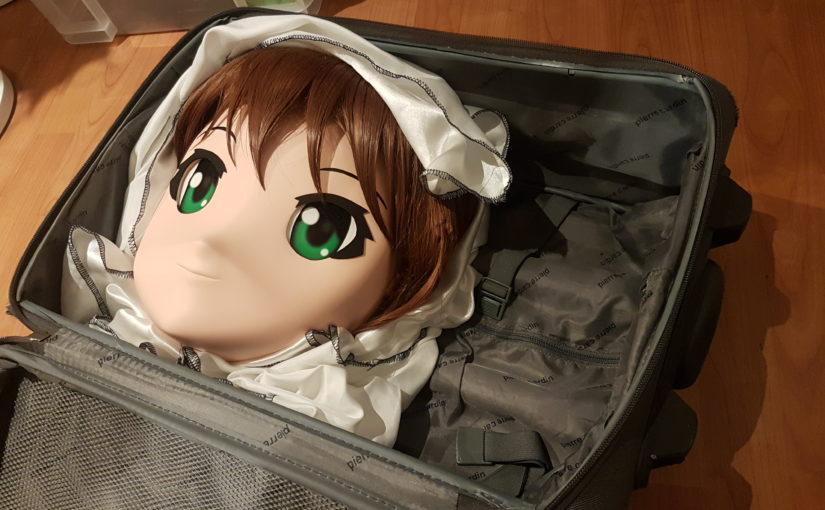
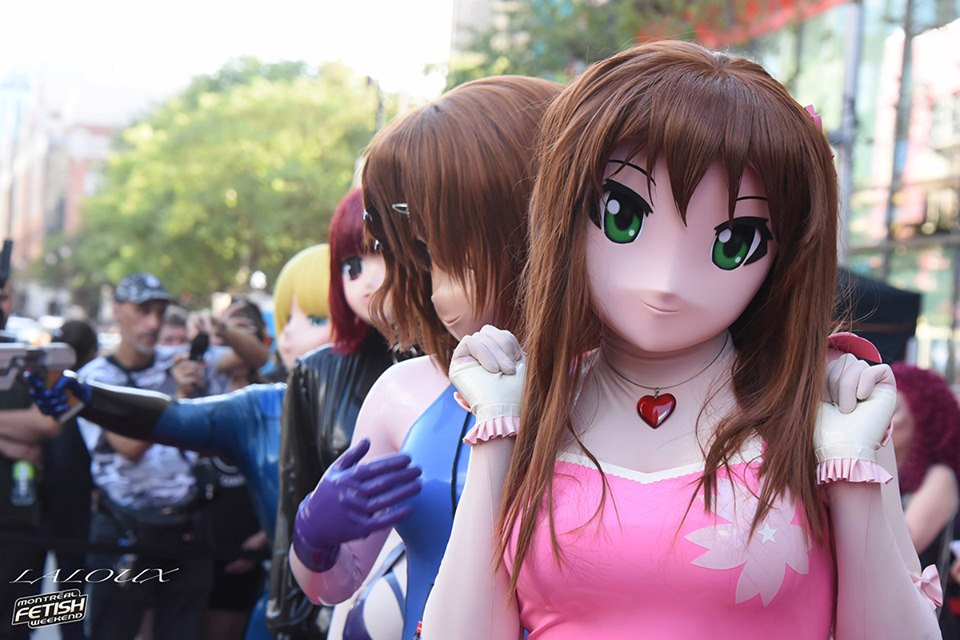
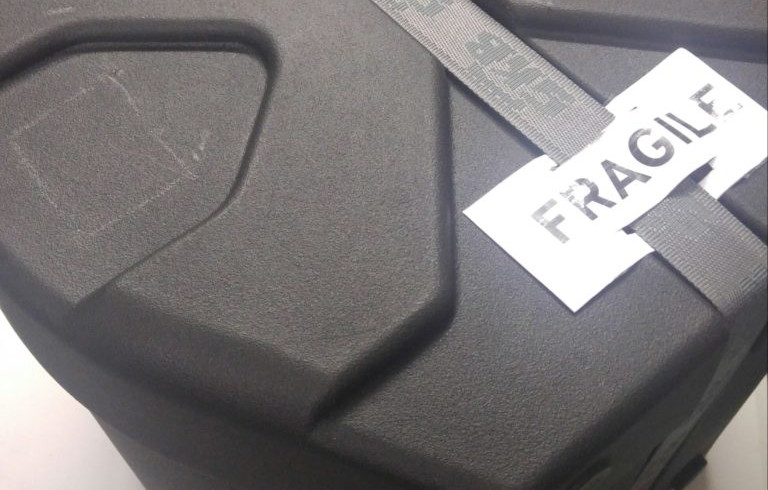
Last year I explained how to take a mask as big as Yui overseas, which involved getting her a protective drum case to herself that could go as checked-in luggage. But there are times when this is expensive, or where you want to be able to throw a mask into carry-on for a quick meet up.
Carry-on luggage restrictions are tough, with many airlines giving you a maximum width of just 25cm (or sometimes even 23cm). Yui was 28cm at a minimum and without any protective padding. I could have bought a half-mask or smaller mask, but people wanted to see Yui at the events.
So this project, travel-yui came into existence. Can I make a mask that looks pretty much like Yui (it’s okay for it be to slightly different, it’s a younger or older Yui from the past or the future), but that’s possible to kig with everything fitting into one carry-on airplane suitcase? And can I do it in time for the German latex ball? The rest of this post is the journey we took to make it happen.
Design
Step one is to make a 3D model of the final mask. I used Blender on Linux using photos of Yui as a reference and made a 3D mask. Blender has a (very) steep learning curve, and it took me a full week from having no Blender knowledge to having the final object. Getting things like the eye shape, width, height, and positioning were the hardest but most important to make this model look good.
It’s worth noting here that “copying” a mask brings up all sorts of concerns, from copyright to ethics. I could have, for example, just used a 3D scan of the original Yui mask, but although this would have been far easier I decided to design it in Blender myself but using Yui as the reference. The company that made Yui is no longer operating, but I did also check with the people behind it and who made Yui originally to make sure it was okay with them to do this as a personal project before I went ahead.
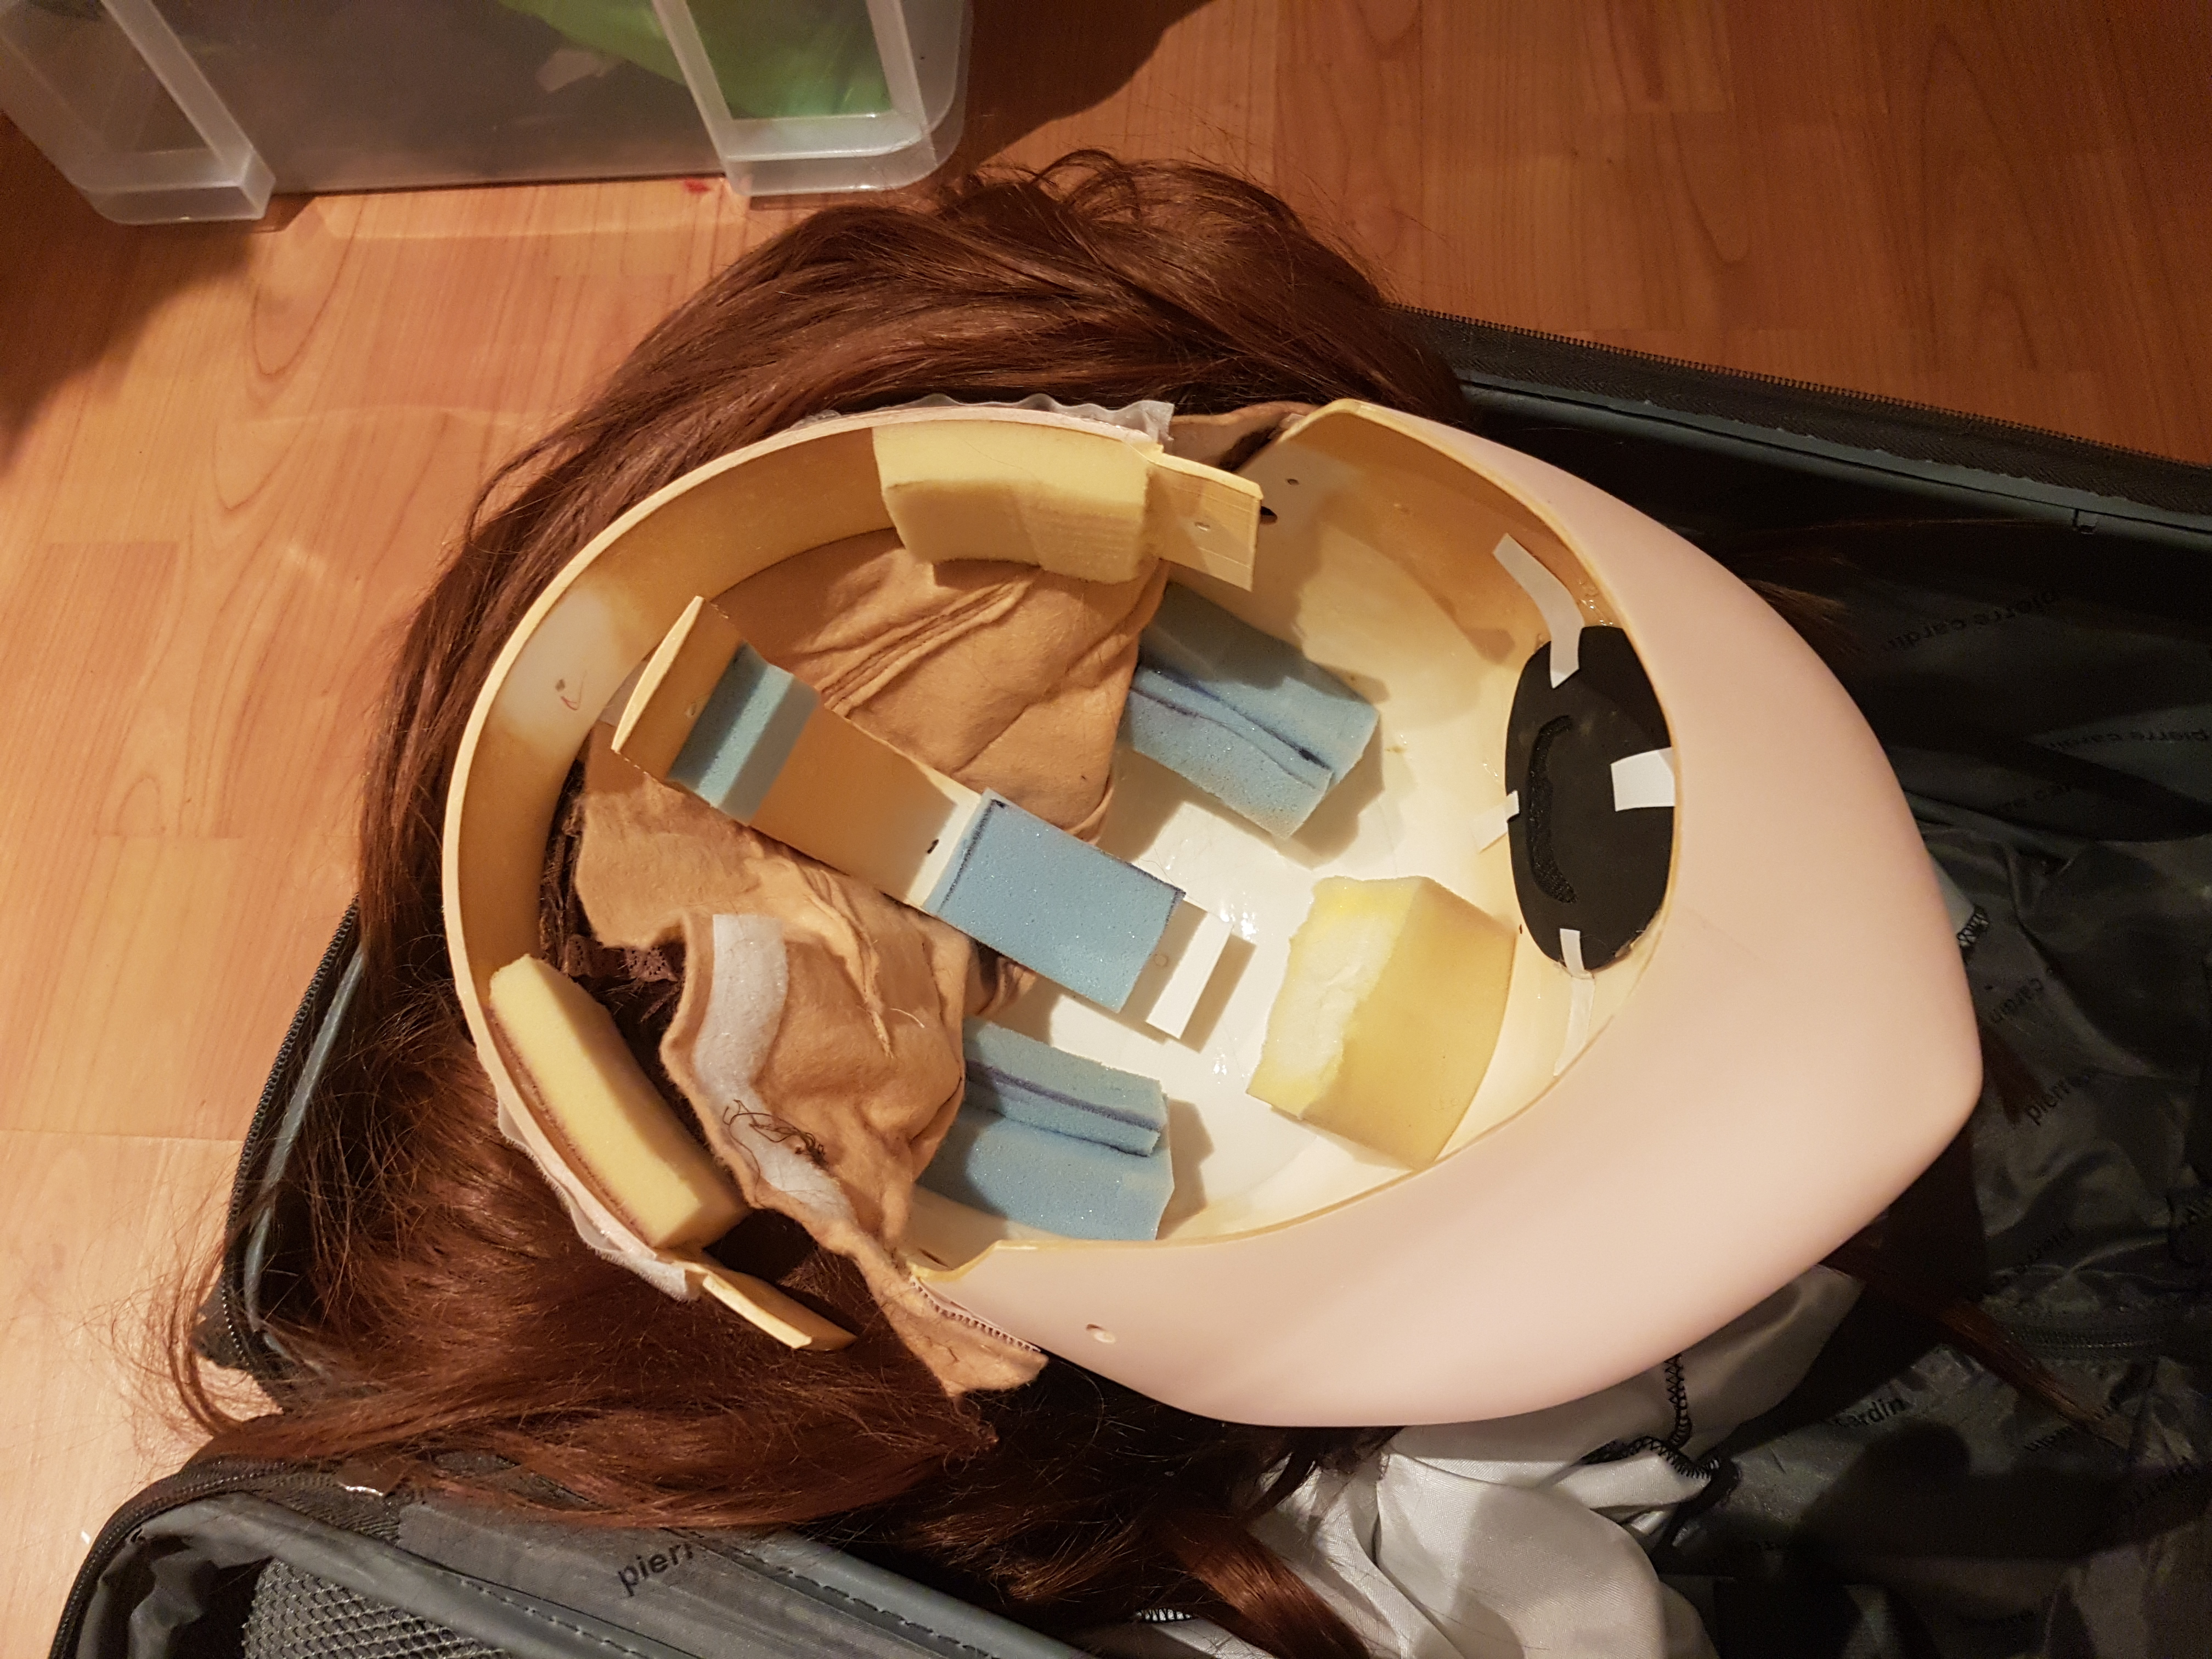
I made the design as a usual 3/4 mask design but then removing the back panel and then adding in some cross supports. The supports can be easily added and removed using screws. I planned to print the ears separately and add them on at the end, but ran out of time (and you rarely see original Yui’s ears anyway).
Printing
I got printing inspiration from both Helenako and Bluegail, who had printed their own masks and not only made them available but also given lots of details of the build process. Since Helenako even had the same printer (CR-10) and filament (Prima Value White PLA) it gave me confidence it would all work out. They also had some great tips on smoothing prints and using wood filler on the outside and cheap epoxy on the inside. In hindsight we’d probably not use wood filler again because it got very messy and is really tricky to wet sand. But more on that later.
I printed the front section in three pieces to eliminate overhang and too much support material, using Cura 4.0 for slicing in .28mm layer height but using the adaptive layers function so areas like the nose would be down to .1mm in places. The first print failed so for stability printed the next one upside down (although I did forget to rotate the model so the Z seam ended up on the face of the model rather than the back, oops, more sanding needed!). Total print time was about 20 hours for the main piece, under 2 days for everything. So we now have a crown, a chin, and a main piece, and two back pieces.
Finishing
After printing, I passed the prints off to Jade for finishing. She noticed the chin on my model had ended up being too smooth once printed so she used putty to sculpt a more pronounced one. The next steps of sanding, filling, sanding, priming with filler primer, sanding, filling, sanding, sanding, sanding took her quite some time, a few hours a day over a week. But the end result is super smooth and flawless and the print lines are completely invisible.
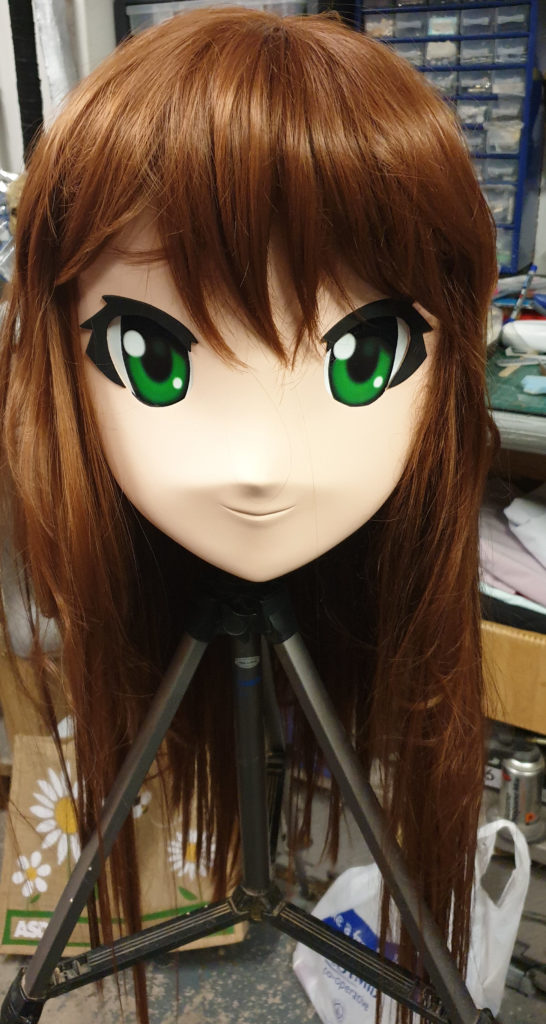
Painting was next, using standard car paint acrylic in a custom kigu colour, then a matt clearcoat normally used for minature models. The clearcoat really helps the mask have a non-shiny finish. We already had a spare set of Yui eyes, so just reused these to save some time (even though the eye openings were not exactly the same size).
Hair was next, we made a removable wig cap out of felt (next time we’d use something that doesn’t stretch and break as easily), then sewed the wigs to it. Bits of foam were added to the wig cap to get the hair to sit right (next time this could be built into the 3d model). Styling the hair took a few hours, and we ended up adding more wefts to the side, straightening, thinning, and cutting again after the first outing.
I’m really very happy with the result. There are a few things with the design I’d tweak for printing another mask (I think the mouth ended up a little high, the chin and nose should be slightly more pointy) but these are easy enough to change for next time.
Thoughts
I didn’t expect the mask to be durable, it’s a PLA 3D print, so it will probably crack or break if dropped and melt if it gets too hot. But it suprised me how it’s held up — travel-yui has made a return trip to Germany, a trip to Montreal, and been in a hot car boot in 45C weather in Arizona and survived without incident so far! And I can always reuse the wig and print another one. Although Jade might not be so enthusiastic for another week of sanding.
I also love making things, 3D printing, LEDs, latex, arduinos, and of course Animegao Kigurumi. So I decided to combine them all into a fun project, a layered circle skirt, made over a couple of weekends.
The final skirt is bluetooth accessible and can run various programs such as patterns, sound to light, and a rather special mode based on a hand-held accelerometer.
I’d attached LED strips to leather before, by using the long strips you can buy that have WS2812B fully-addressable RGB LEDs on them and sticking them to the leather. But latex, being stretchy, posed some new challenges.
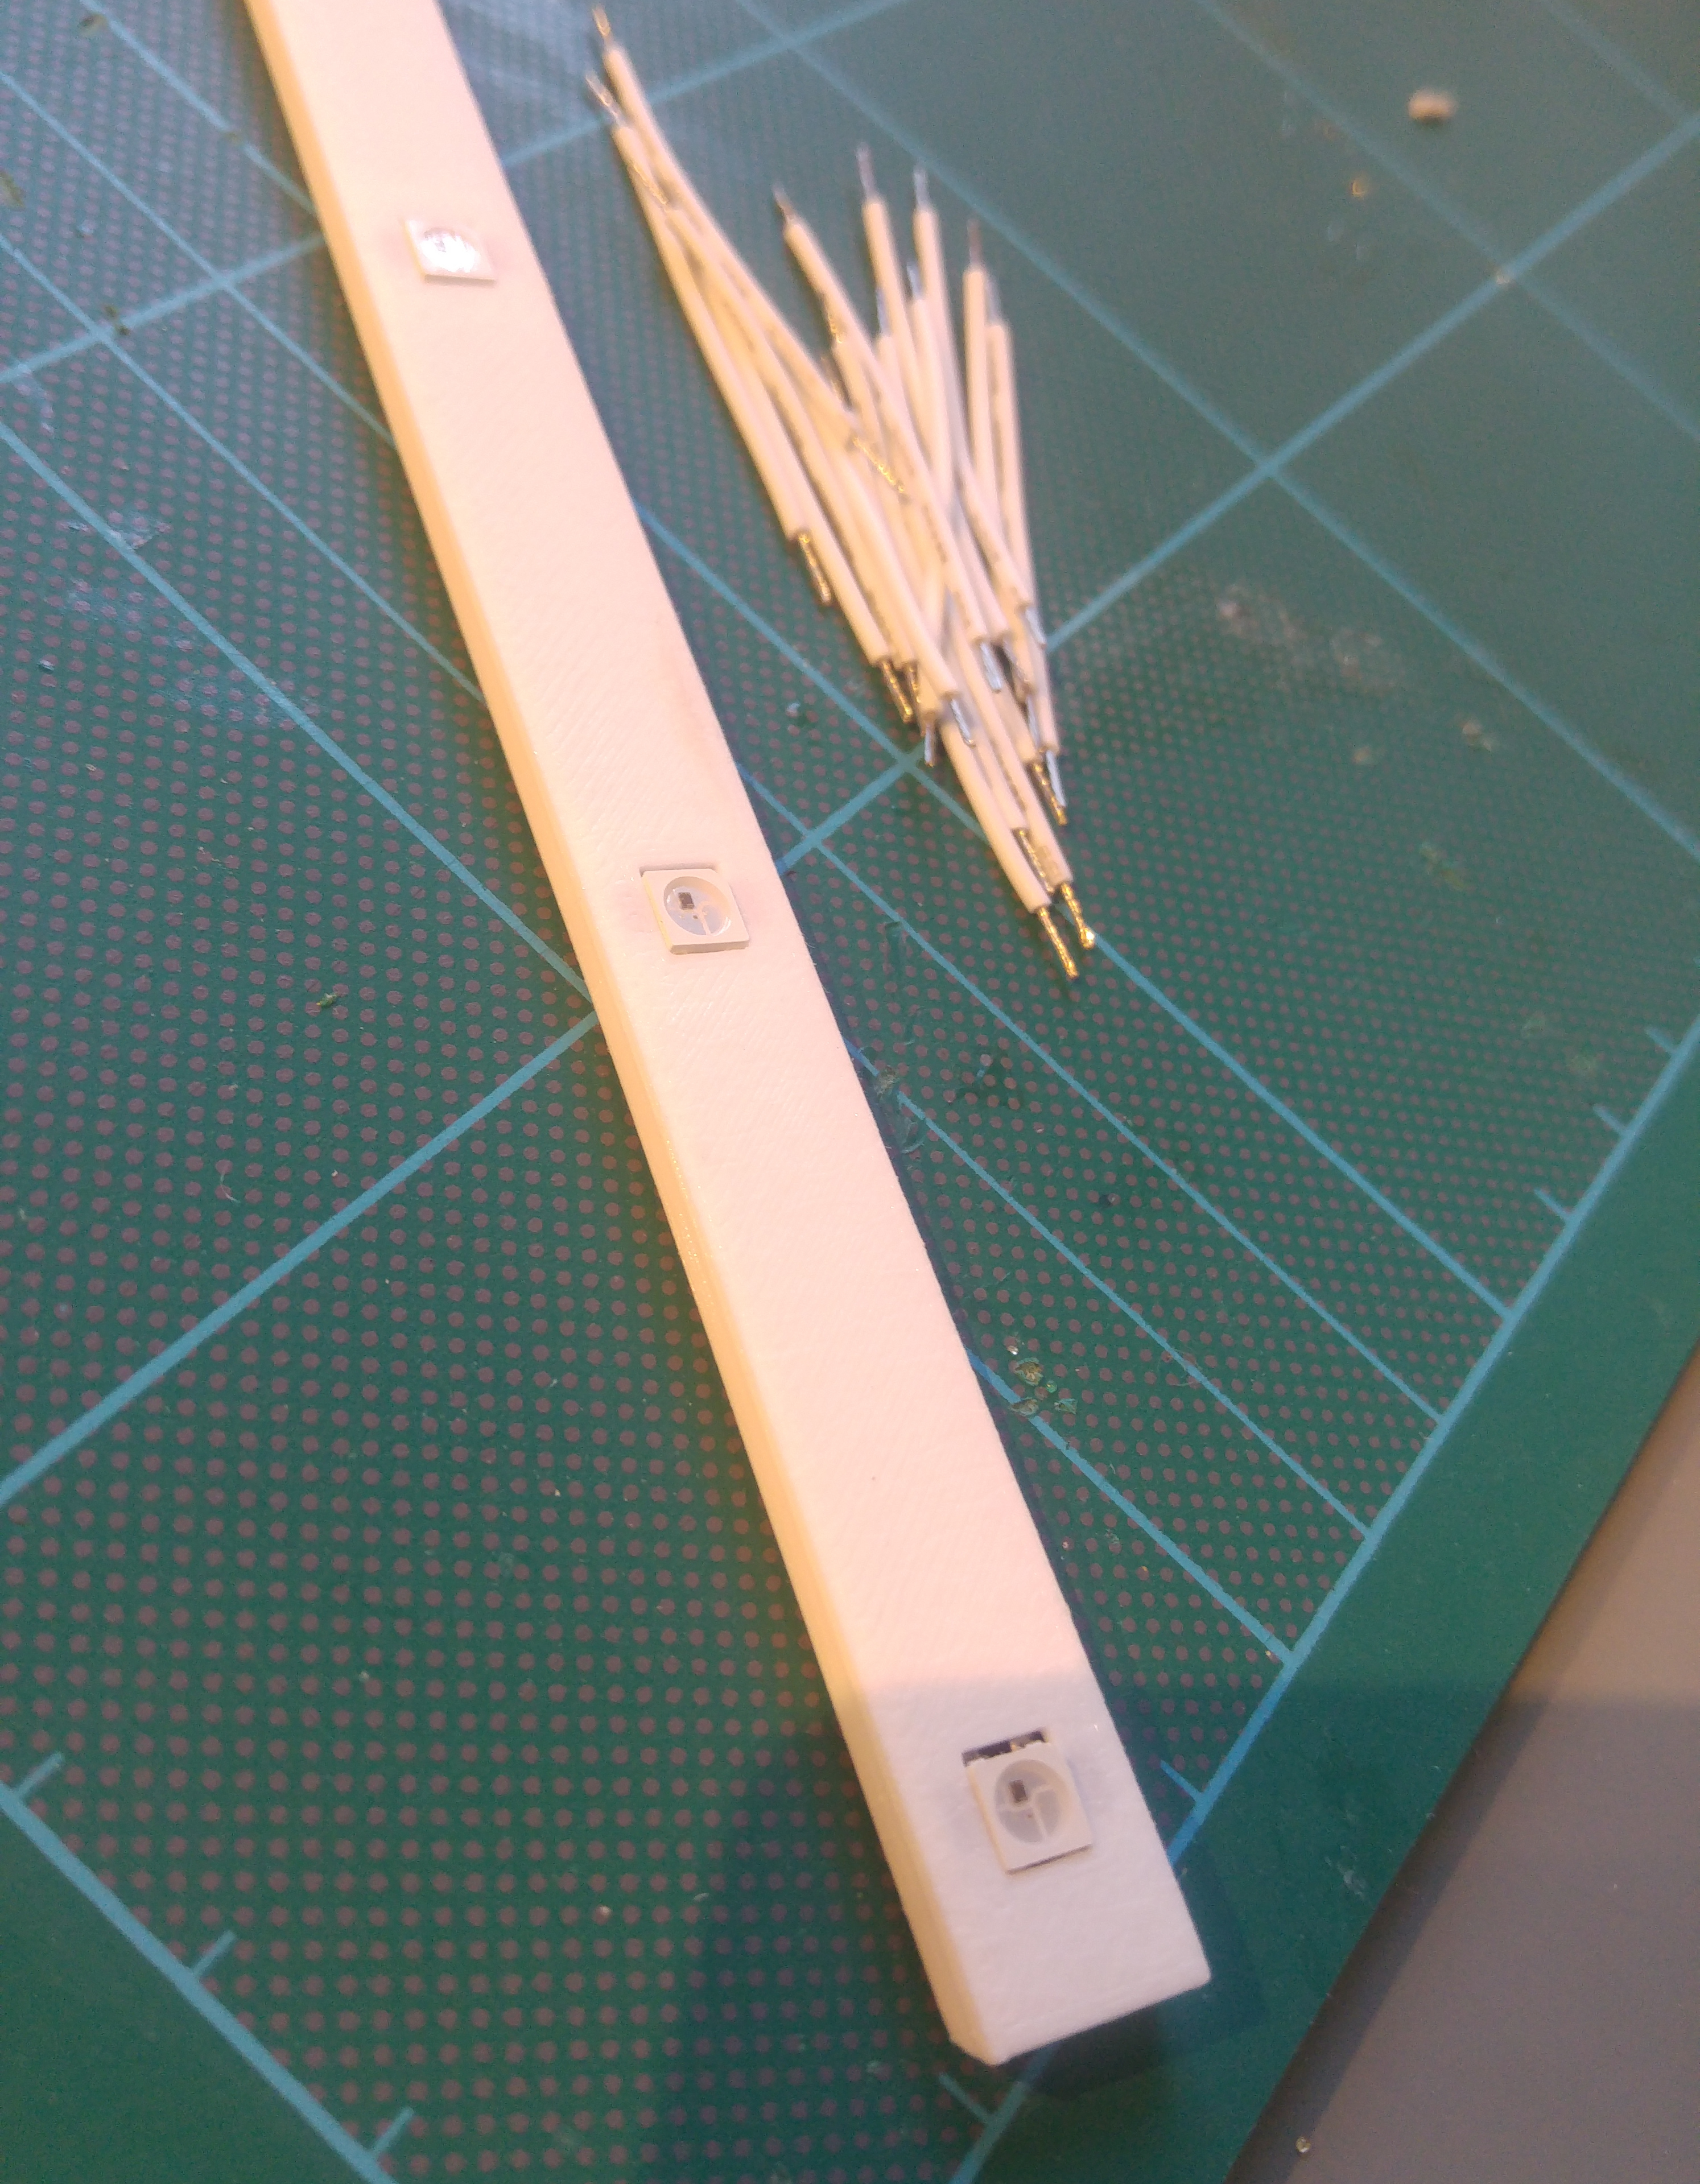
After some experiments with strips I decided instead on making a 3D printed tray and using individual LEDs. You can pick up 50 of the LEDs very cheaply from Aliexpress or ebay. Using a tray adds some rigidity which protects the wiring and helps the LEDs stand out around the circle skirt, and also lets me position them wherever I like. It makes the strips easier to take in and out of the skirt, and there is still a tiny bit of flexibility along the length.
Since this is a skirt overlay to sit on top of another circle skirt, I decided on a triangle pattern, with 7 triangles (making 7 strips), with each strip being between 6 and 7 LEDs (somewhat randomly). If you think of Madoka Magica that was the rough idea. This meant the strips needed to be 275mm long, which also meant they could be printed in one piece on my CR-10.
Using OpenSCAD for design after a few attempts I was able to print a piece that a WS2812B single LED would snap into. Then I made a strip with a bevelled edge so it can be easily threaded into the latex. Each tray took a couple of hours print time in white PLA:
The 7 LED strips are wired in series, so the “data out” at the end of the strip runs back up to the top and into the “data in” of the next strip. This complicates the programming a little but saves having lots of extra snaking data wires.
I hooked everything up with 26AWG silicone coated wire which was a good compromise between size and ability to handle the current: If all 50 LEDs were set to white at the same time then the first power wires would be carrying 3Amps, but the wires are short and the patterns rarely have all LEDs on at the same time, and even less likely to all be white, and my battery wouldn’t be able to handle that anyway.
The control box is powered by an ardunio-like microcontroller. I used a DFRobot Beetle because I happened to have one around and they’re small and cheap, but any Ardunio board would do. Hooked to the Beetle is a MSEQ7 graphic equalizer IC connected to a sparkfun microphone board with auto gain control. Using a chip for the graphic equalizer rather than coding it makes the programming so much easier. Also hooked to the Beetle is a HC-05 bluetooth (normal bluetooth, not LE) module.
Power is provided by a small rechargable USB battery. I got this one at a trade show so I’m not sure it’s capacity, but it easily can run the controller and LEDs for many hours on a charge. The controller and electronics were housed in a 9V battery case I had spare.
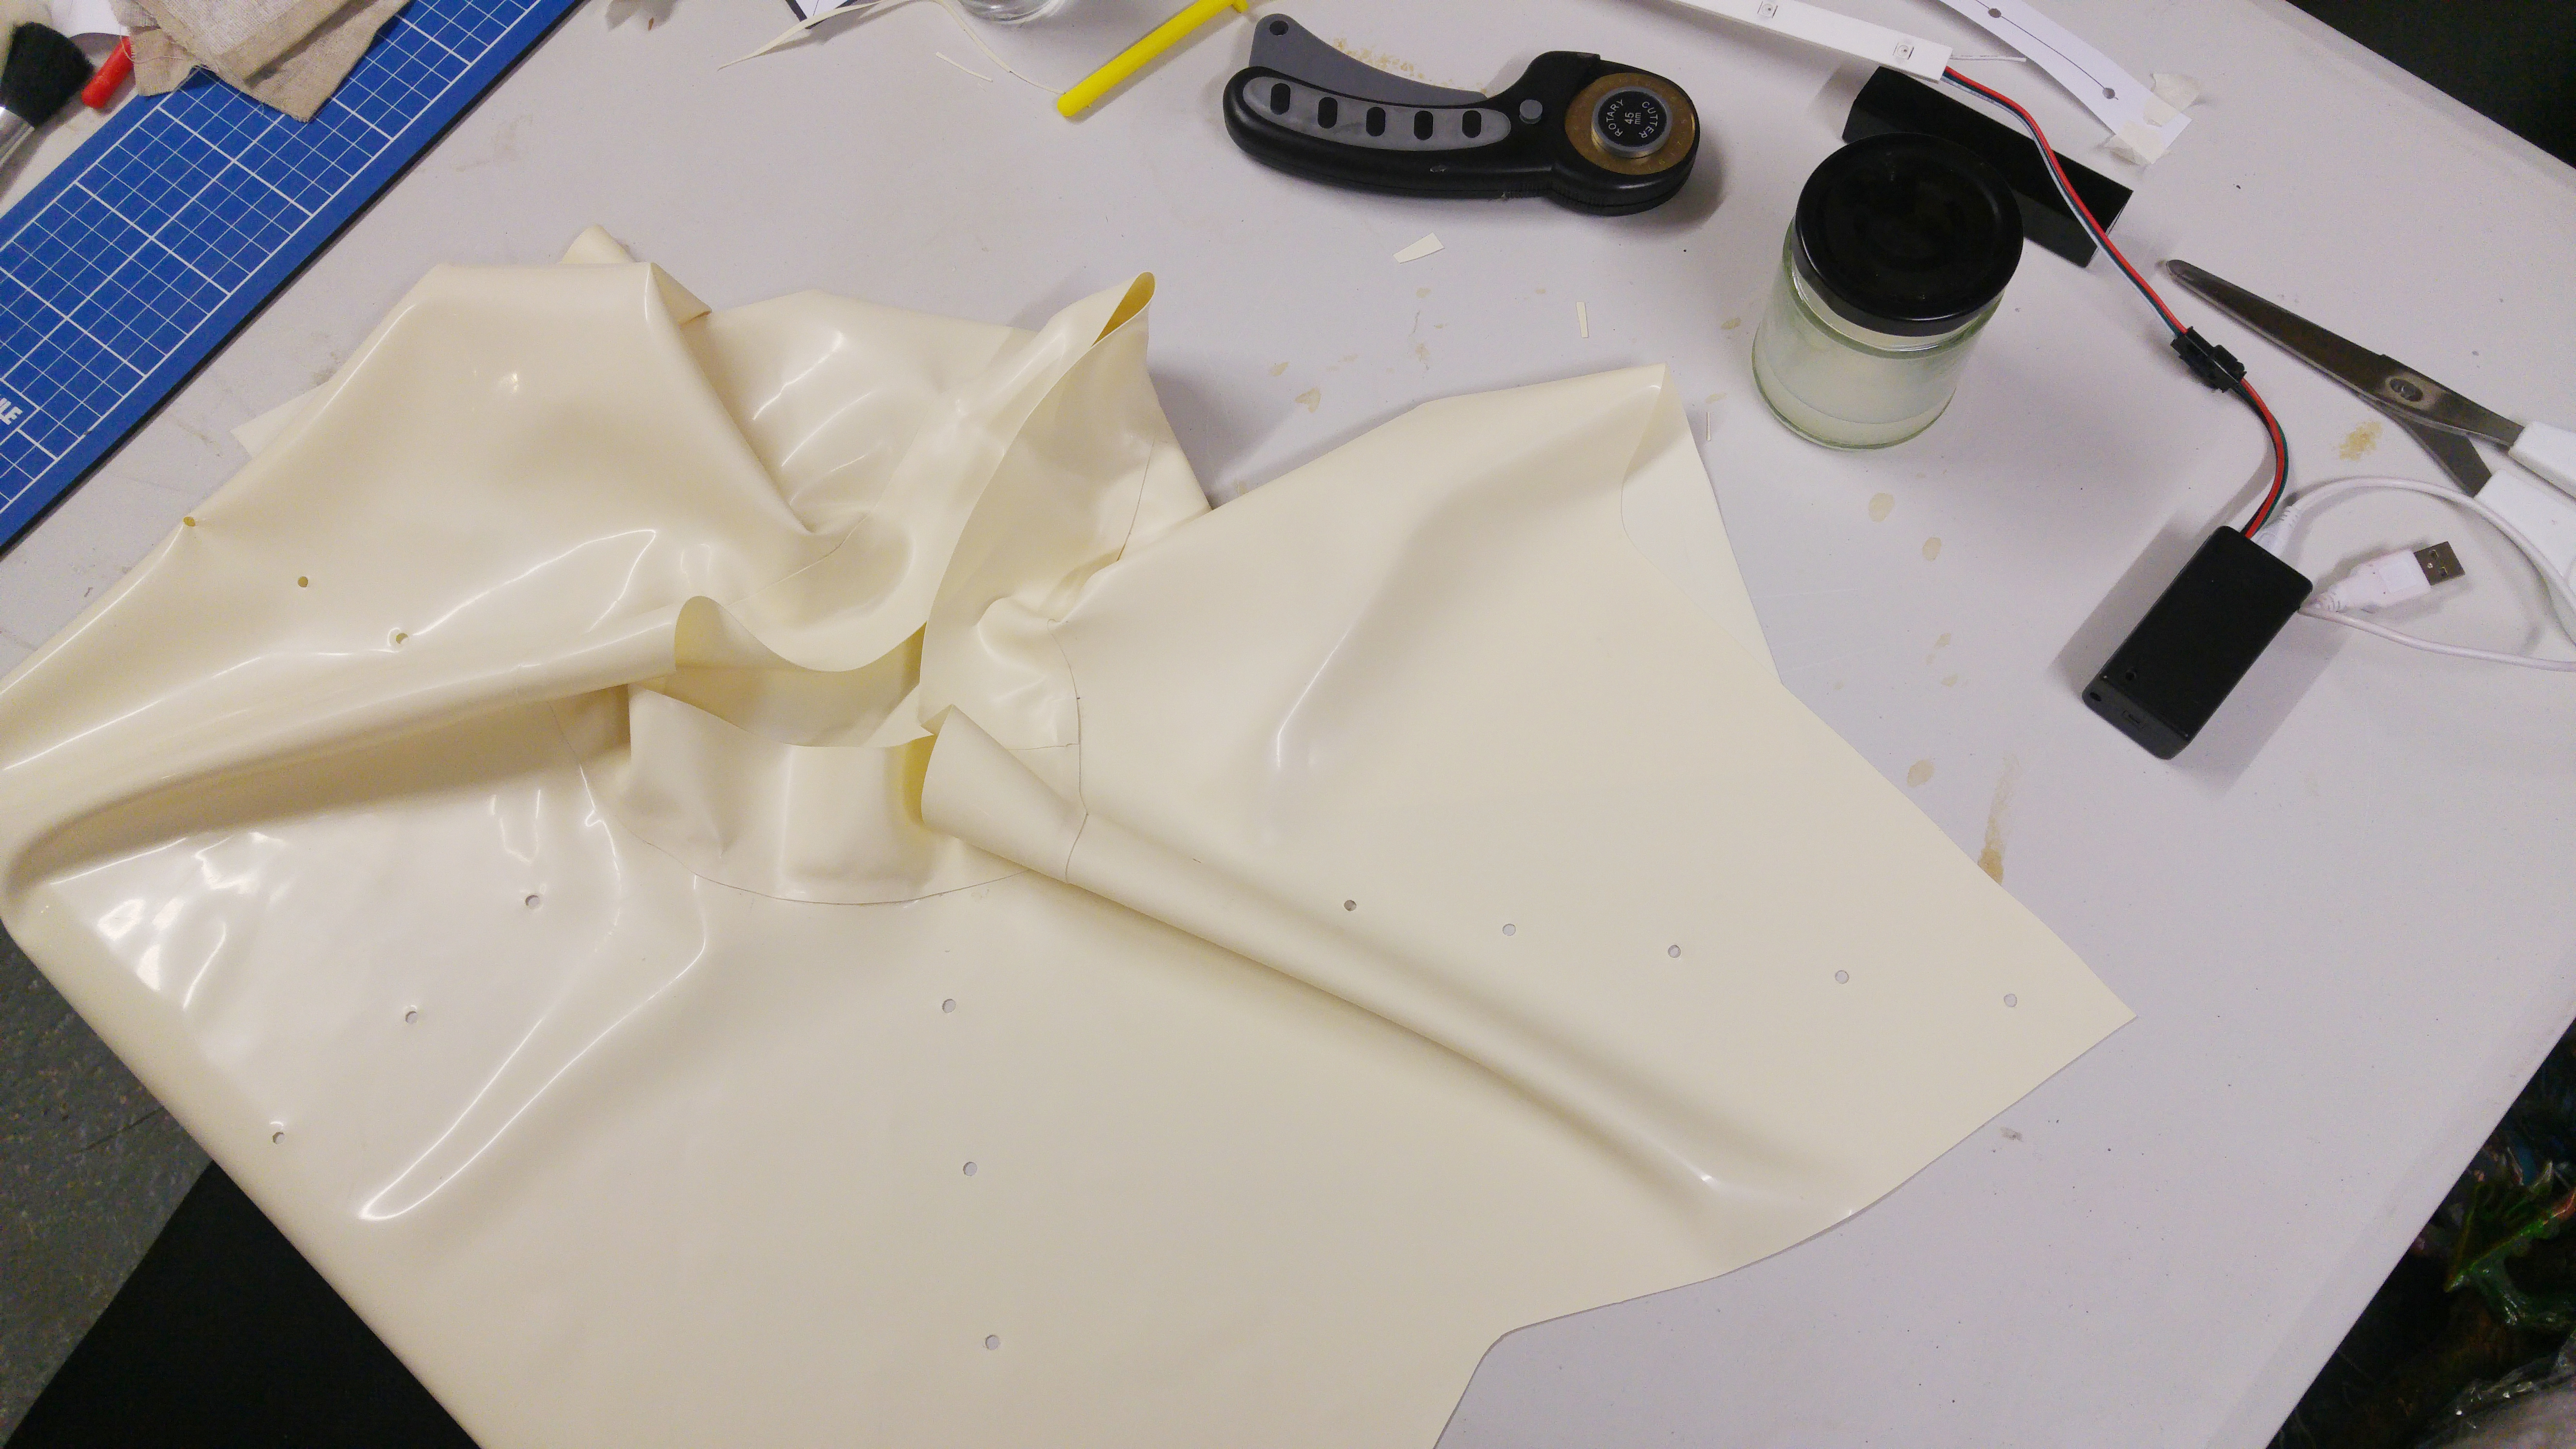
Knowing the length of the triangles for the skirt, and my waist size (minus 10% for stretch) I drew up a pattern in Inkscape and used it to cut out the latex. Because there are 7 triangles it didn’t separate into sections well, so I just cut it complete out of a single piece which also saved adding a seam. I added a 5cm waist band to the top.
After marking all the holes Jade helped me punch them out, using a leather punch over some hardwood. This was far more effort than it should have been and I’ve since learnt that the “Prym” punch pliers work amazingly well for making perfect small holes in latex.
Originally each LED tray was going to slide down into a complete latex pocket, enclosed on all three sides, but this was a failure. It was almost impossible to get the trays into and out of the pocket. The idea is to be able to remove the electronics to add to different skirts in the future, or to fix any issues, or just to allow the skirt to get cleaned and shined.
What worked well was adding little strips of latex behind each of the LEDs. This protects the underskirt from anything metal that might cause a stain as well as pressing the LED against the front of the skirt.
A few people have commented that I could reinforce the latex around the holes using cotton tape then it won’t stretch, but I’ve found that it really isn’t needed and if something does move and the hole doesn’t quite align, the LED still shines quite well through the white latex.
A pocket was made to hold the battery and control box with a small hole to not muffle the microphone too much and that pocket was attached to the back of the skirt.
Since making the skirt I upgraded it removing the thick connectors and wires between strips and replacing them with tiny JST connectors instead. The patterns I use rarely have many of the LEDs on at once, so thinner wire is just fine. I also added a button to change modes as getting a phone out and connecting to the skirt takes too long for a quick change.
For the future I’m going to cut the skirt down the back seam and add poppers to save having to stretch it over hips and undoing and reconnecting the connectors when putting it on, this will help if having to take it on and off like when getting a taxi or sitting down somewhere.
I was about to take my first trip overseas on a plane with Yui to a German meet up. Asking around, many performers take their masks as hand-held luggage, but Yui was too large for that, coming in at a minimum dimension of 25cm. The budget European airline we were taking had a 23cm limit, and they were known to be quite strict about enforcing this. I didn’t want to end up at the airline with them forcing me to check in the mask at the last minute, so she’d have to go checked in.
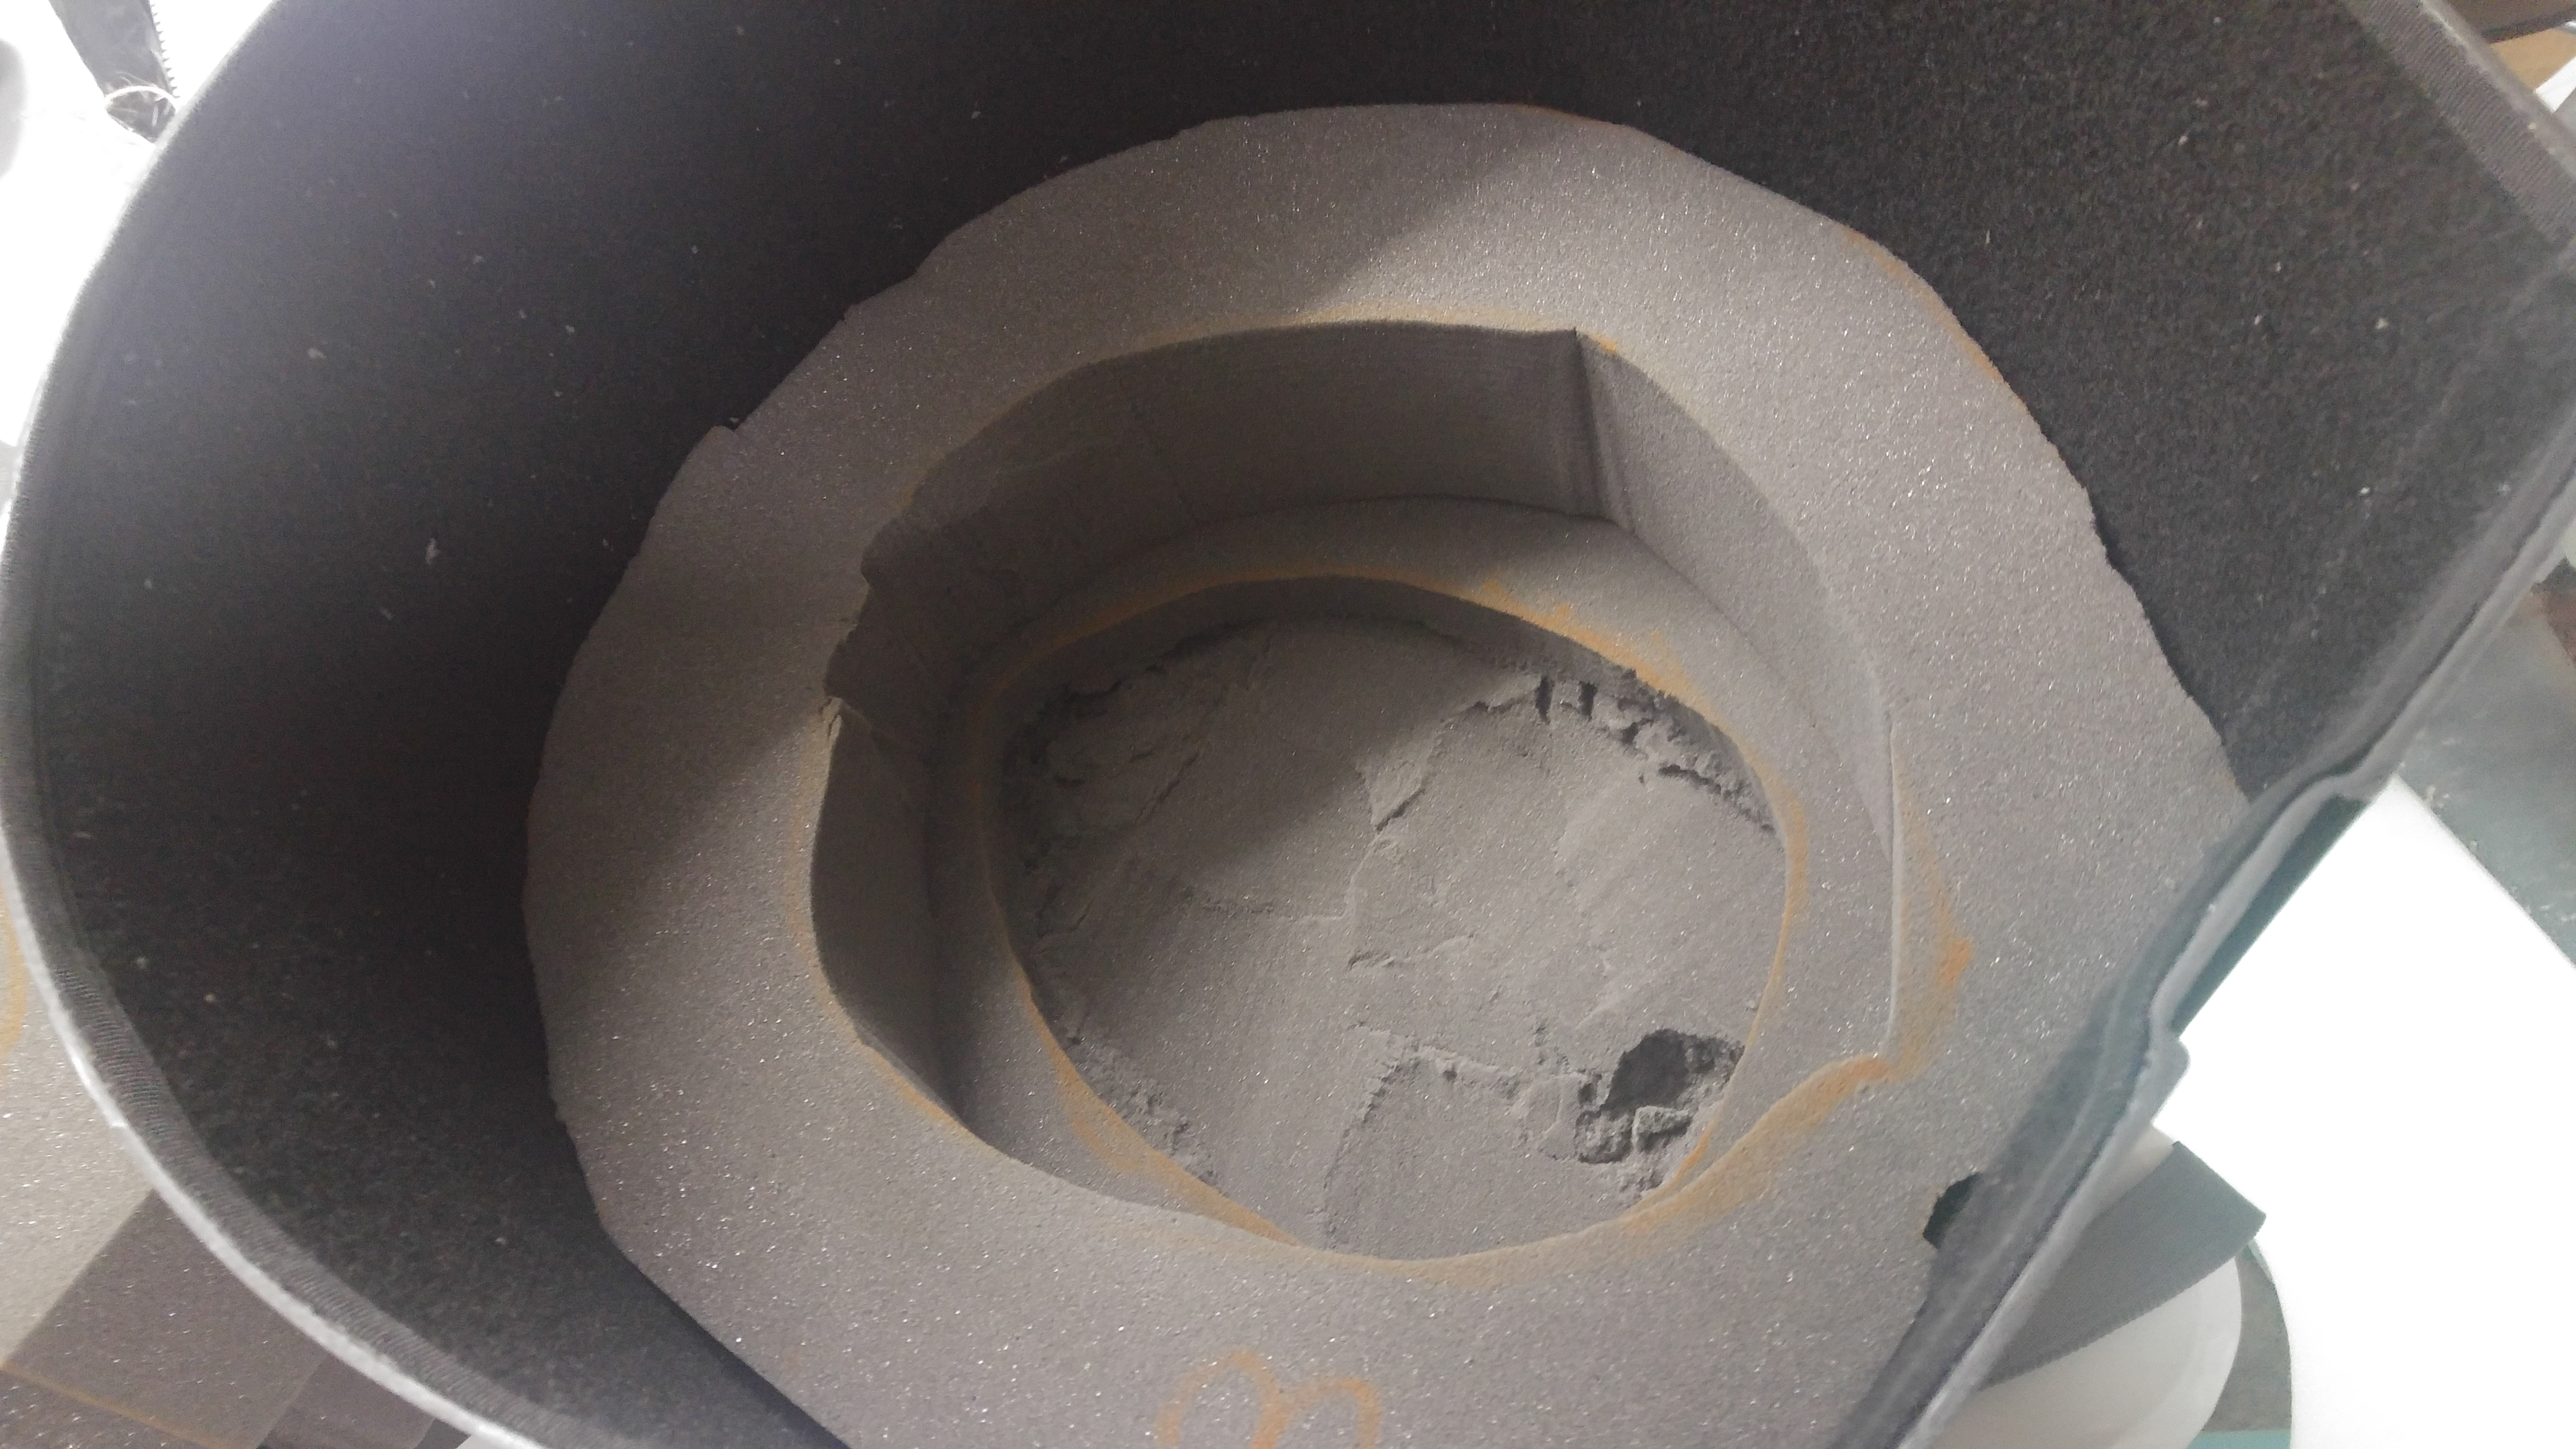
Asking around, other performers also put their masks in suitcases with careful padding, but that seemed scary. The performers I asked who didn’t carry on or use suitcases used drum cases. So I found a suitably sized case in a sale, a SKB D1414, a 14 inch tom case (for £70).
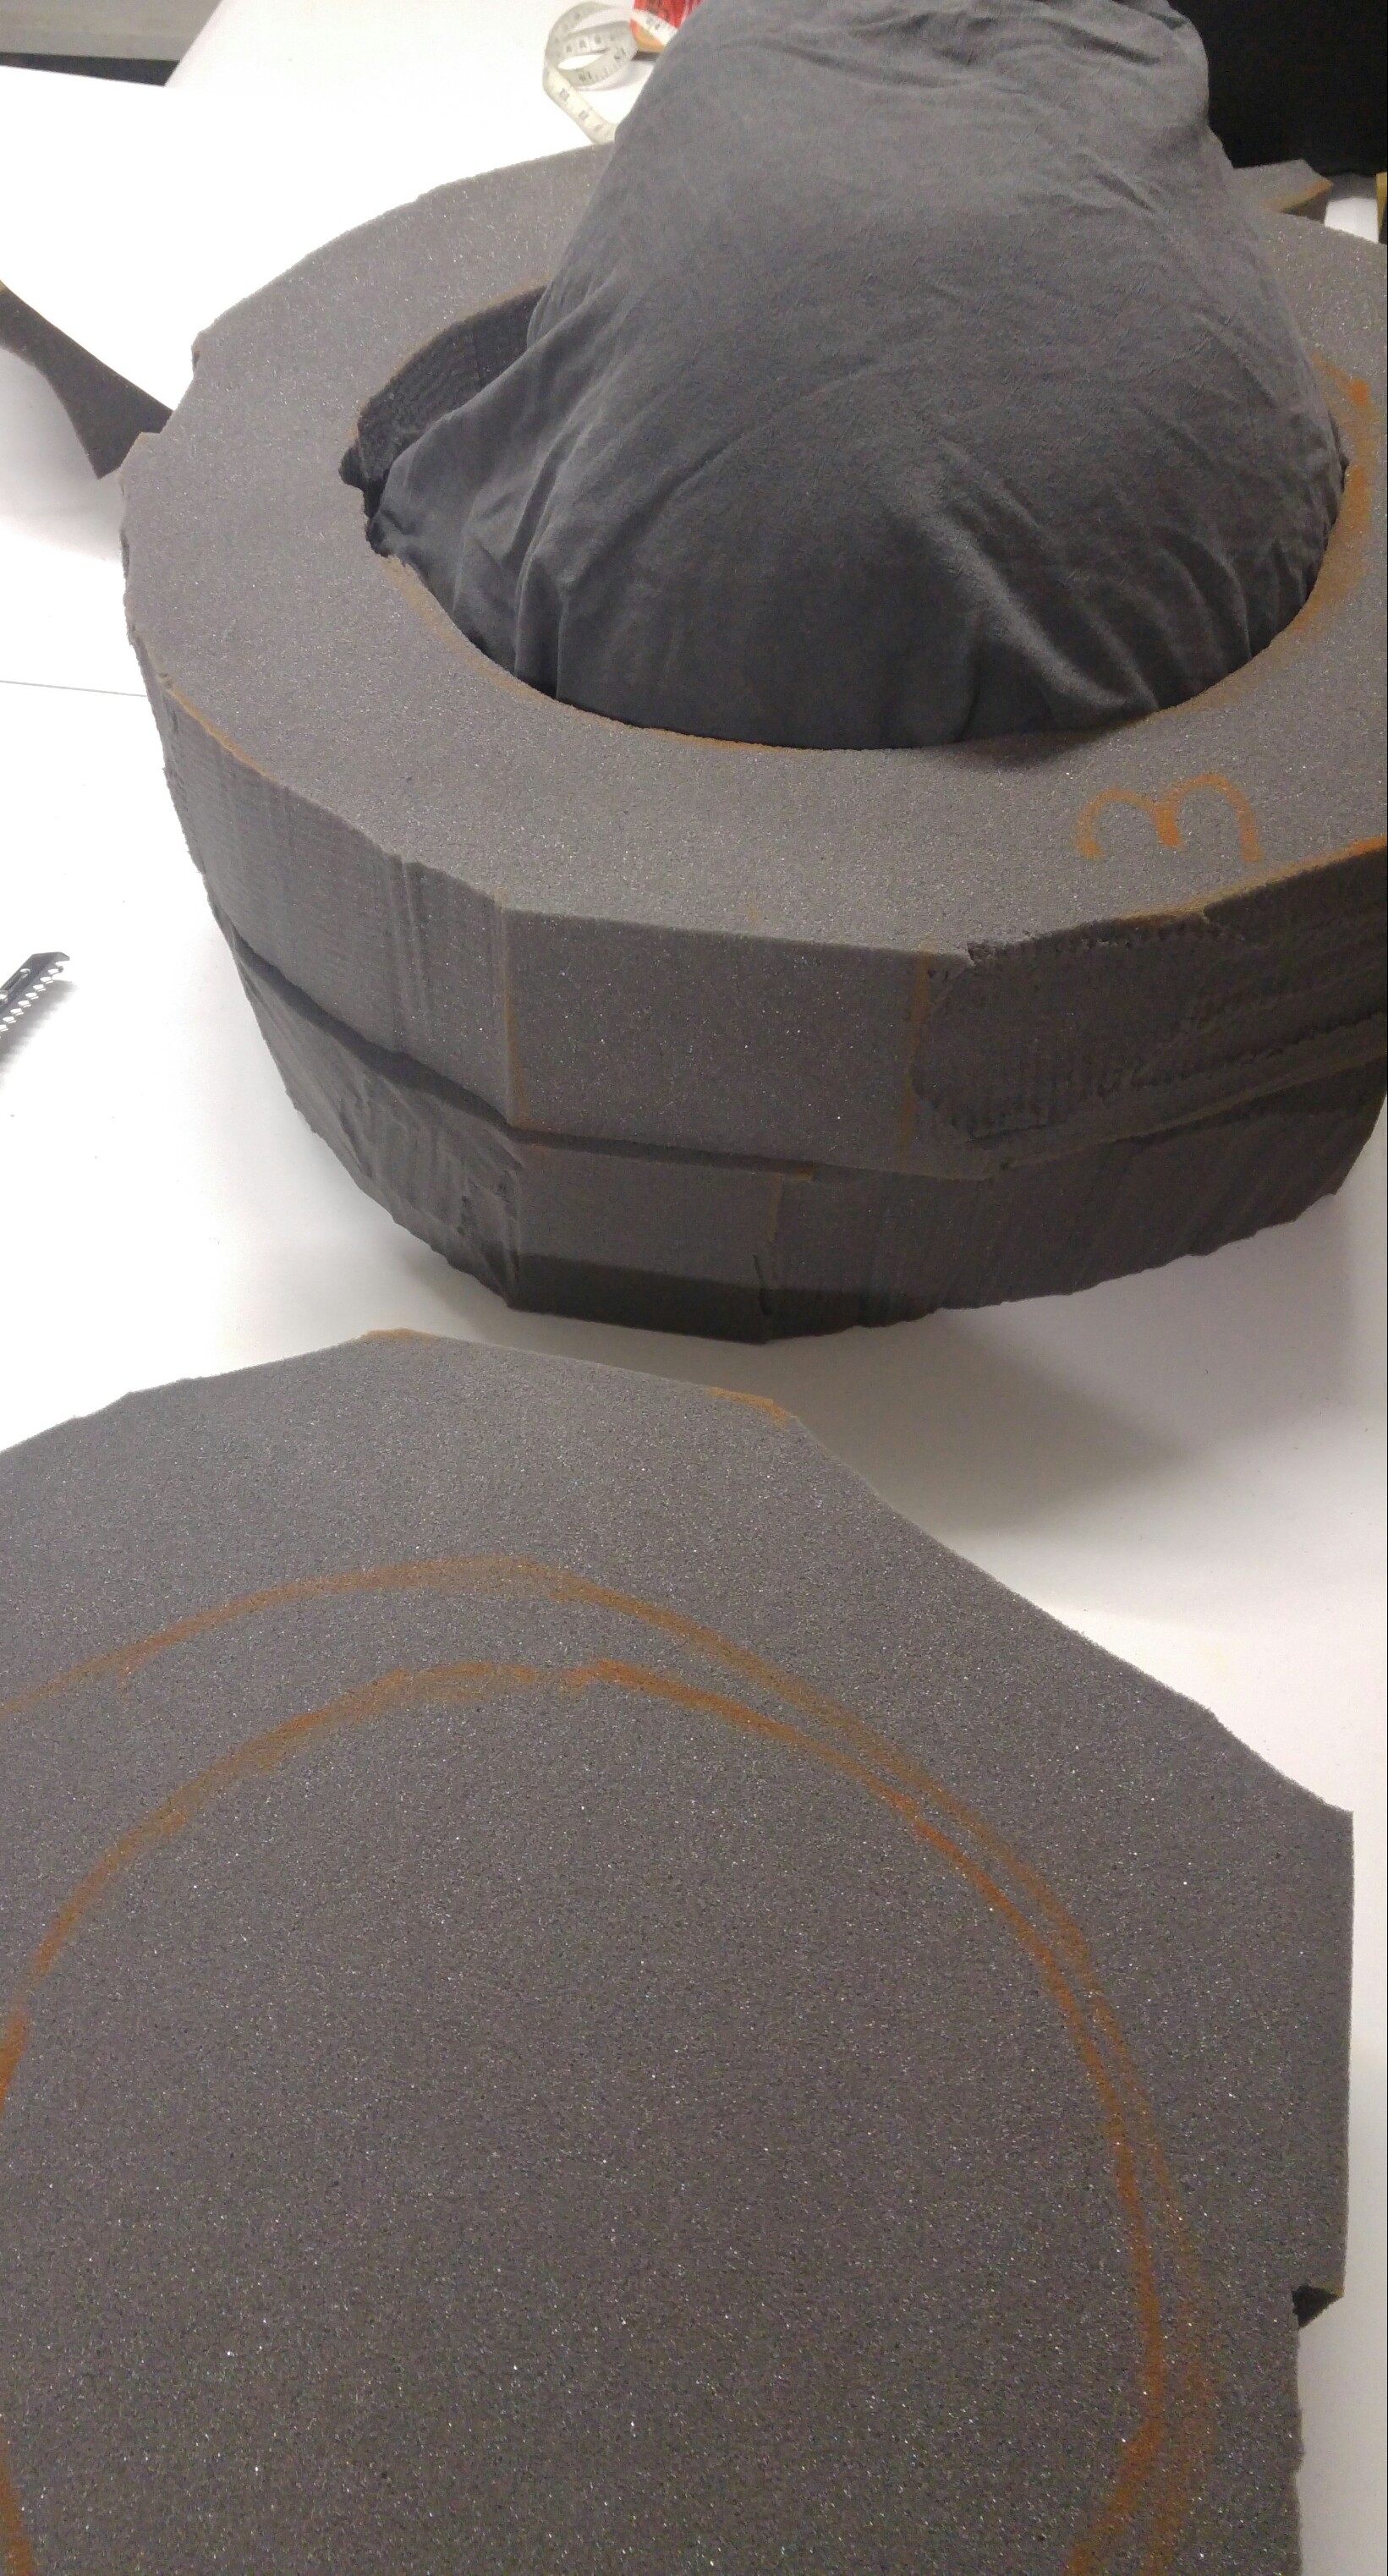
I was going to get foam to wrap around the mask, but decided instead to completely fill the case with foam and cut out a Yui-sized hole in the middle. So I bought four 18 inch by 18 inch blocks of packing foam from a UK company (for £40).
Then just some time to do measurements and cut the foam (with an electric carving knife).
Checking in the case was straightforward, although both times it had to be taken to a special counter at the airport once we’d checked it in and it was labelled. We’ve flown twice and there’s been no issues at all so far.
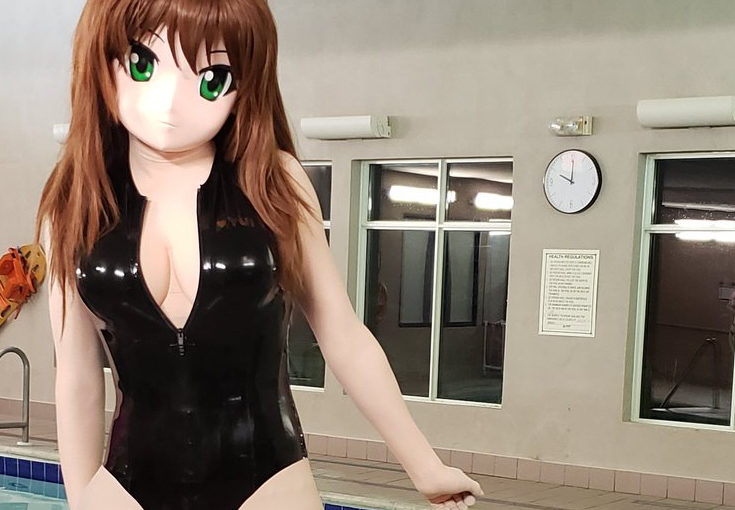
Our good friend TLC Latex came to visit to teach me how to make latex clothing. I needed a swimsuit, so we decided to make a custom one in the common style with double-opening front zip.
After learning the basics we started by making a “block pattern” of my sizes. We then made this pattern into a swimsuit design, transferred it onto a .6mm latex sheet, cut it, and assembled it. The zip was actually salvaged from an old catsuit that had perished some years ago and we added in the extra zip pull. It took most of the afternoon for us to make it.
Later Jade Tatsuko helped me add an applique of “Yui” to the breast. The fit is really good, but I would slightly update the pattern to have a higher neck, and maybe alter the cut of the legs. We didn’t get around to adding a hem to those, but they might look nice with some ruffles!
 kigyui-latexpatterns-inflatablehips.pdf
 kigyui-latexpatterns-inflatablehips.zip
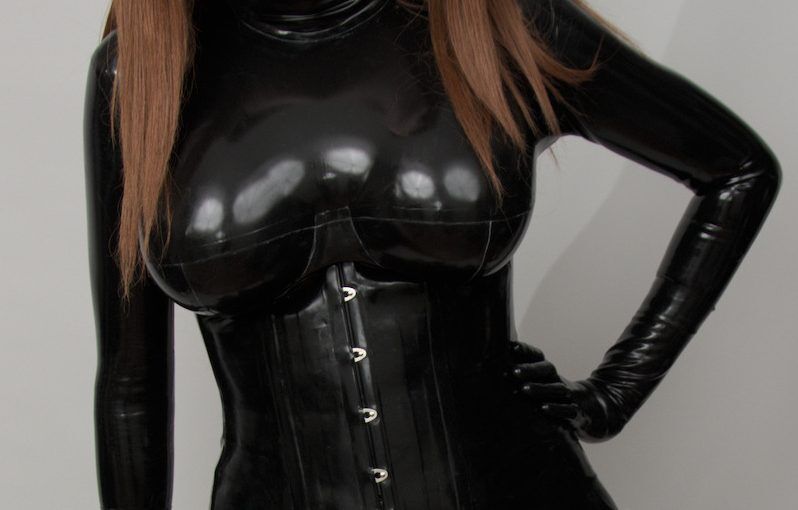


