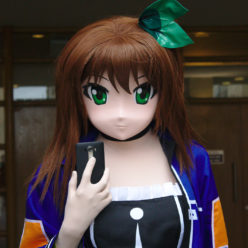
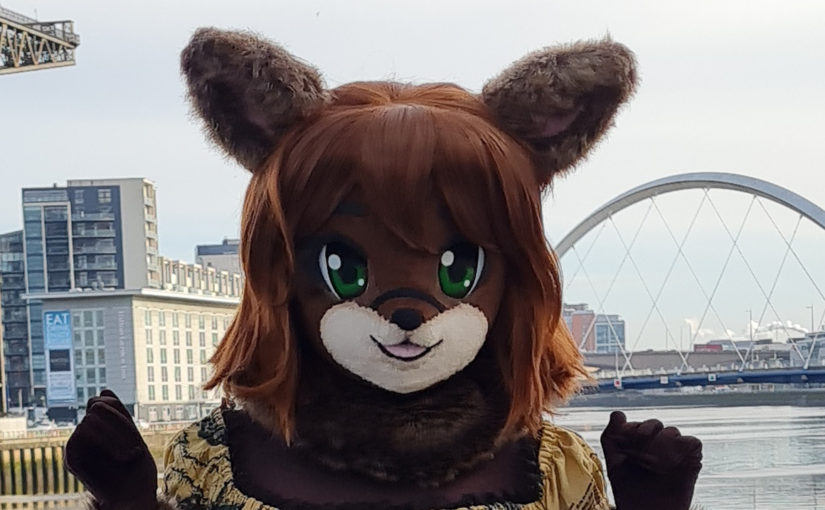
In 2019 @PeachyPig made me a furry moose Yui. A few years later I was able to show her off at Glasgow ScotiaCon 2022. It was my first fursuit convention and it was so much fun.
On the first day I wore my steampunk/gothic map dress and corset belt and took pictures of the squinty-bridge and Clyde crane. I tried being a concierge, but it’s hard when you can’t speak. The best part was meeting so many cute floofy fursuiters.
That night was the disco and wore a cute sparkly lycra outfit and holographic shoes and had a little dance.
Saturday I wore my orange-red maid outfit and had fun in the rain, inside the hotel, and in a room full of inflatable toys.
After 2020 with no events things started happening again. I had some friends over for fun Kig times, went to MCM Birmingham Comic Con and large Christmas meet.
It was great to be able to get back to events, and our first for a while was the MCM ComicCon in Birmingham in November 2021. On the first day I took Coconut from Nekopara. These photos from day two are in my BanG Dream outfit, cosplaying Maya from Pastel*Palettes
Photos by @AmityDeWolf and include @JadeTatsuko and @Natasha_kig
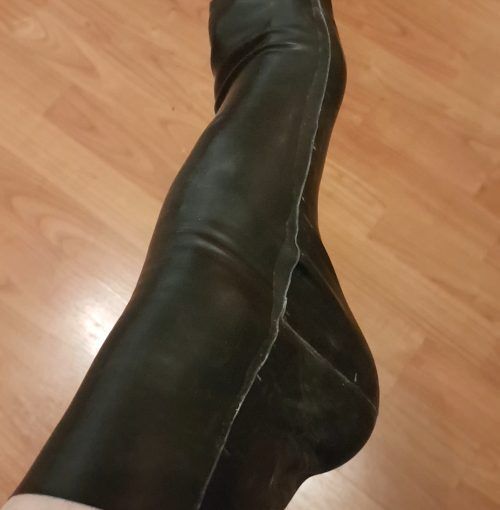
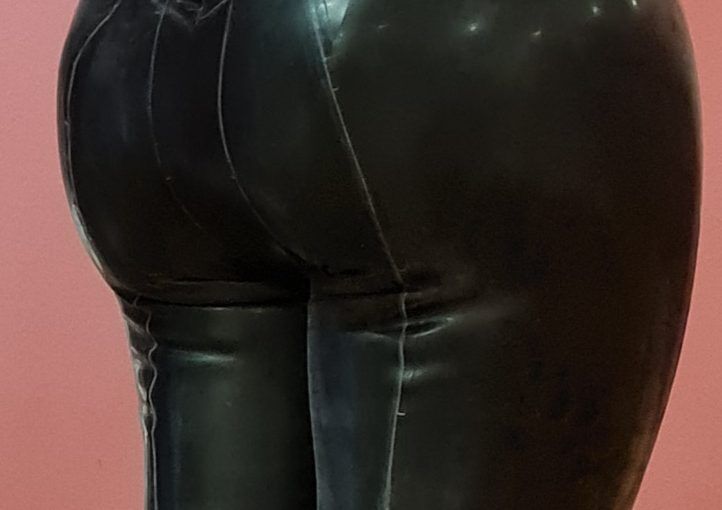
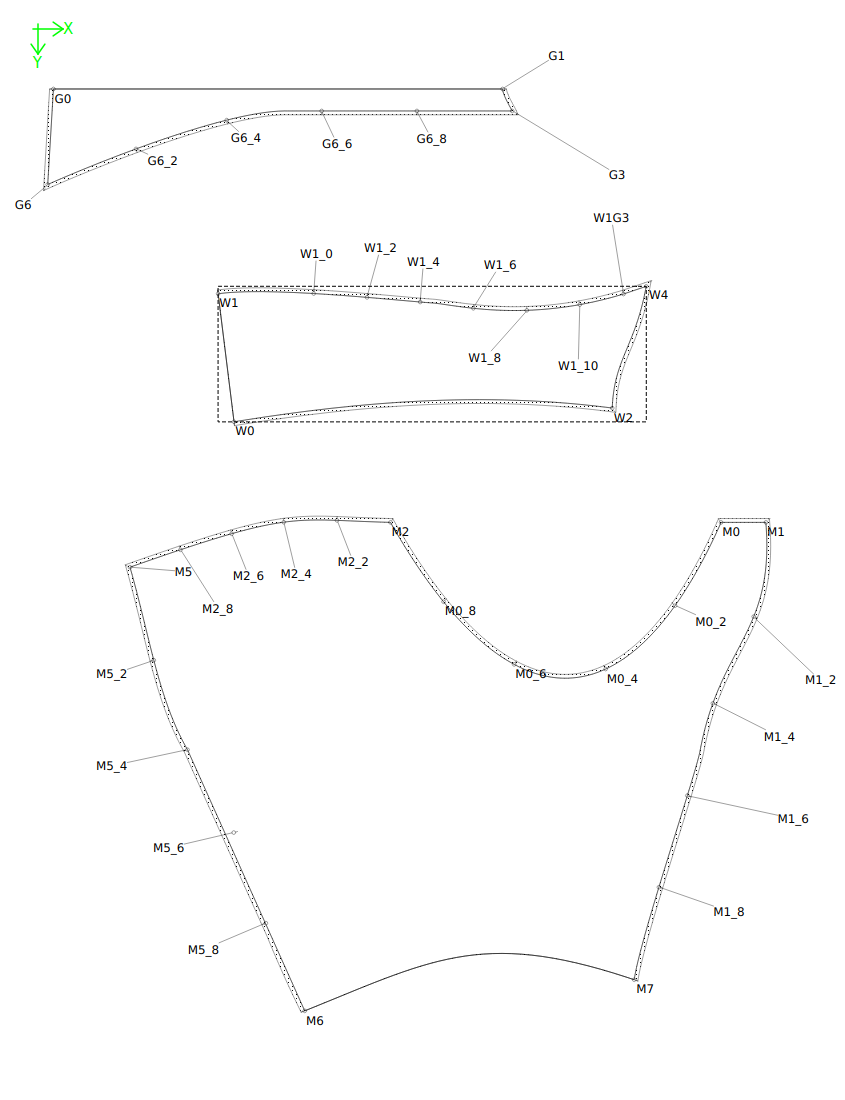
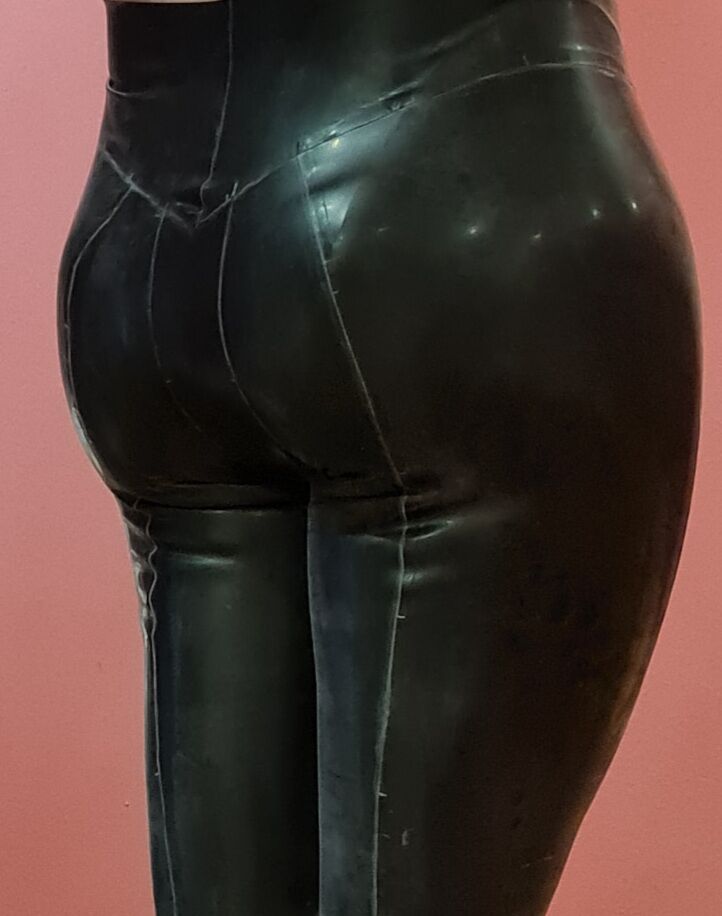
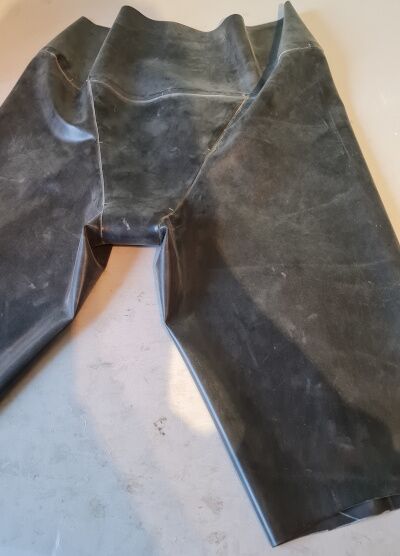
I’ve been searching for the perfect latex leggings. My ideal leggings will, in a single item
Hold in silicone hip pads
Act as a Gaff, but allow toilet breaks
Hold in foam butt pads
Give a nice butt definition
So can we come up with a design like that? This is my first attempt. It’s based on a duct-tape pattern but I’ve modified the pattern so it should be able to scale to measurements. It’s not as refined a work as my pocket-top, so you’ll need to do some work to get a nice pattern out of this.
I used
* 0.4mm latex in black for the main parts
* 1mm latex in black for the gaff part
* A random zip I had handy
For the prototype I only made the leggings extend to just above the knee (because I ran out of black .4mm latex). A future prototype will include full legs too.
I’m probably 70% happy with the design as it stands; it’s better than anything else I’ve owned. I do feel we can make it even better though.
No events this year, but lots of fun at home. I got some new outfits including a wedding dress, and two outfits of Maya from BanG Dream! Pastel*Pallettes. I got a FurKig (a fursona transformation of Yui).
I also made some new latex outfits this year; the latex top, leggings, and apron. The patterns are available for free here.
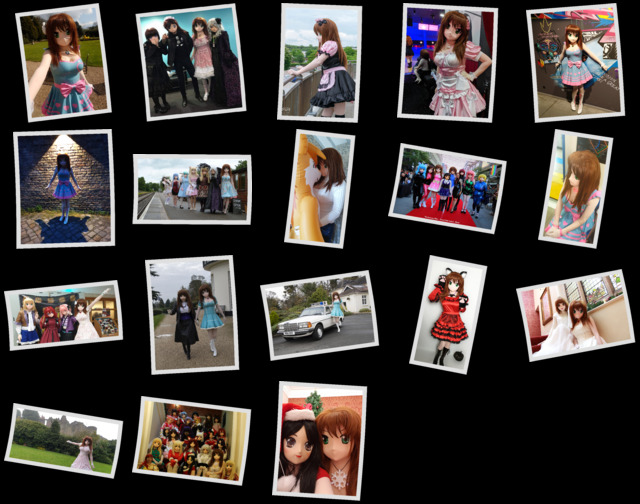
2019 was full of fun, events, and meeting lots and lots of friends:
Spring
We started the year with the 3rd anniversary of being a Kigu and a long weekend latex retreat away in the country with Skye. I got to ride in a sidecar, drink beer, and play on an inflatable unicorn! I wore a new dress we designed for this event, full of love hearts, made by the awesome folks at Black Sheep Latex.
Next was one of the usual highlights of the year, Yorkshire Cosplay Con. We had fun, we took photos, and even had Spencer Wilding (aka Darth Vader) trying on a kigu mask. He’s so tall! Afterwards we went bowling, which I think was a first for UK kigus? I have kig bowled before in 2018 in Toronto, but did worse this time, coming third, but it was still great fun.
In May we went for a week in Berlin for GFB. The first outing for Travel-Yui. I was able to get in some dancing on the dance floor on the Saturday main ball, then watched the fashion show before heading outside for some cool river air.
Summer
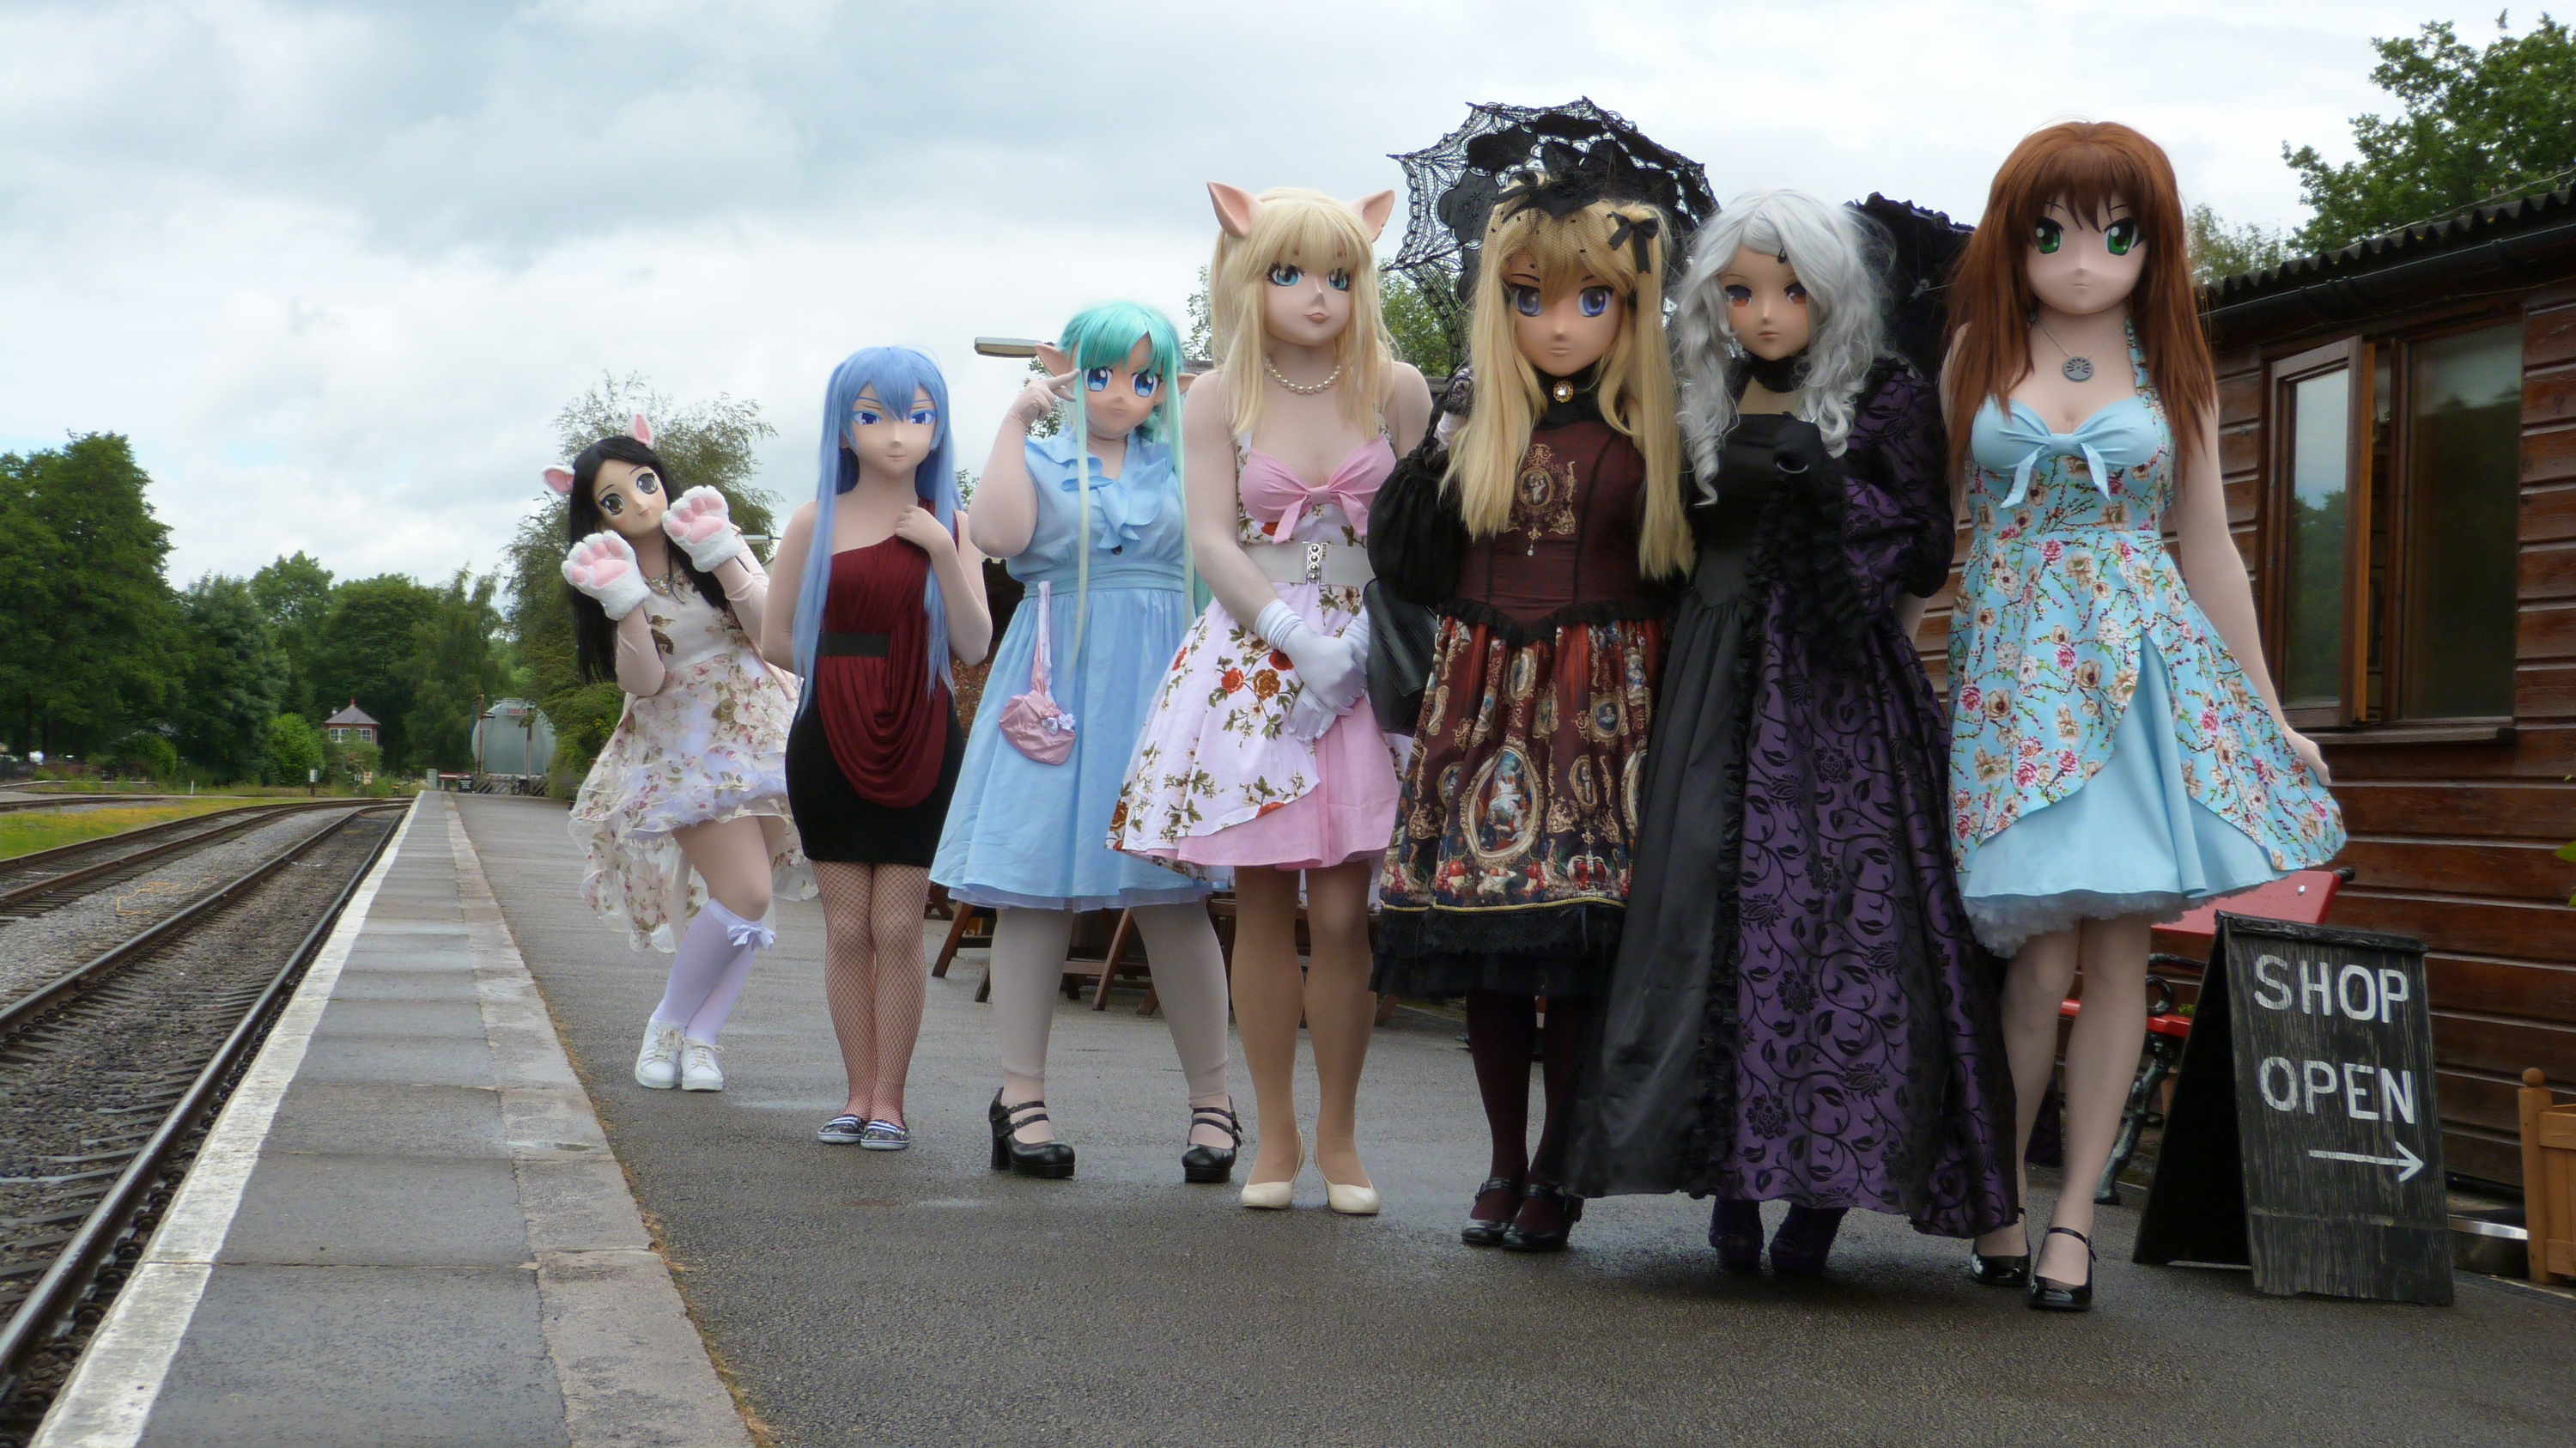
A group of kigus from around the UK met up for a house party. We had an organised trip to the Peak Rail station and got lots of photos with the staff and a steam train. The house was full of inflatable pool toys…. but no pool. I’m not a big fan of
water anyway.
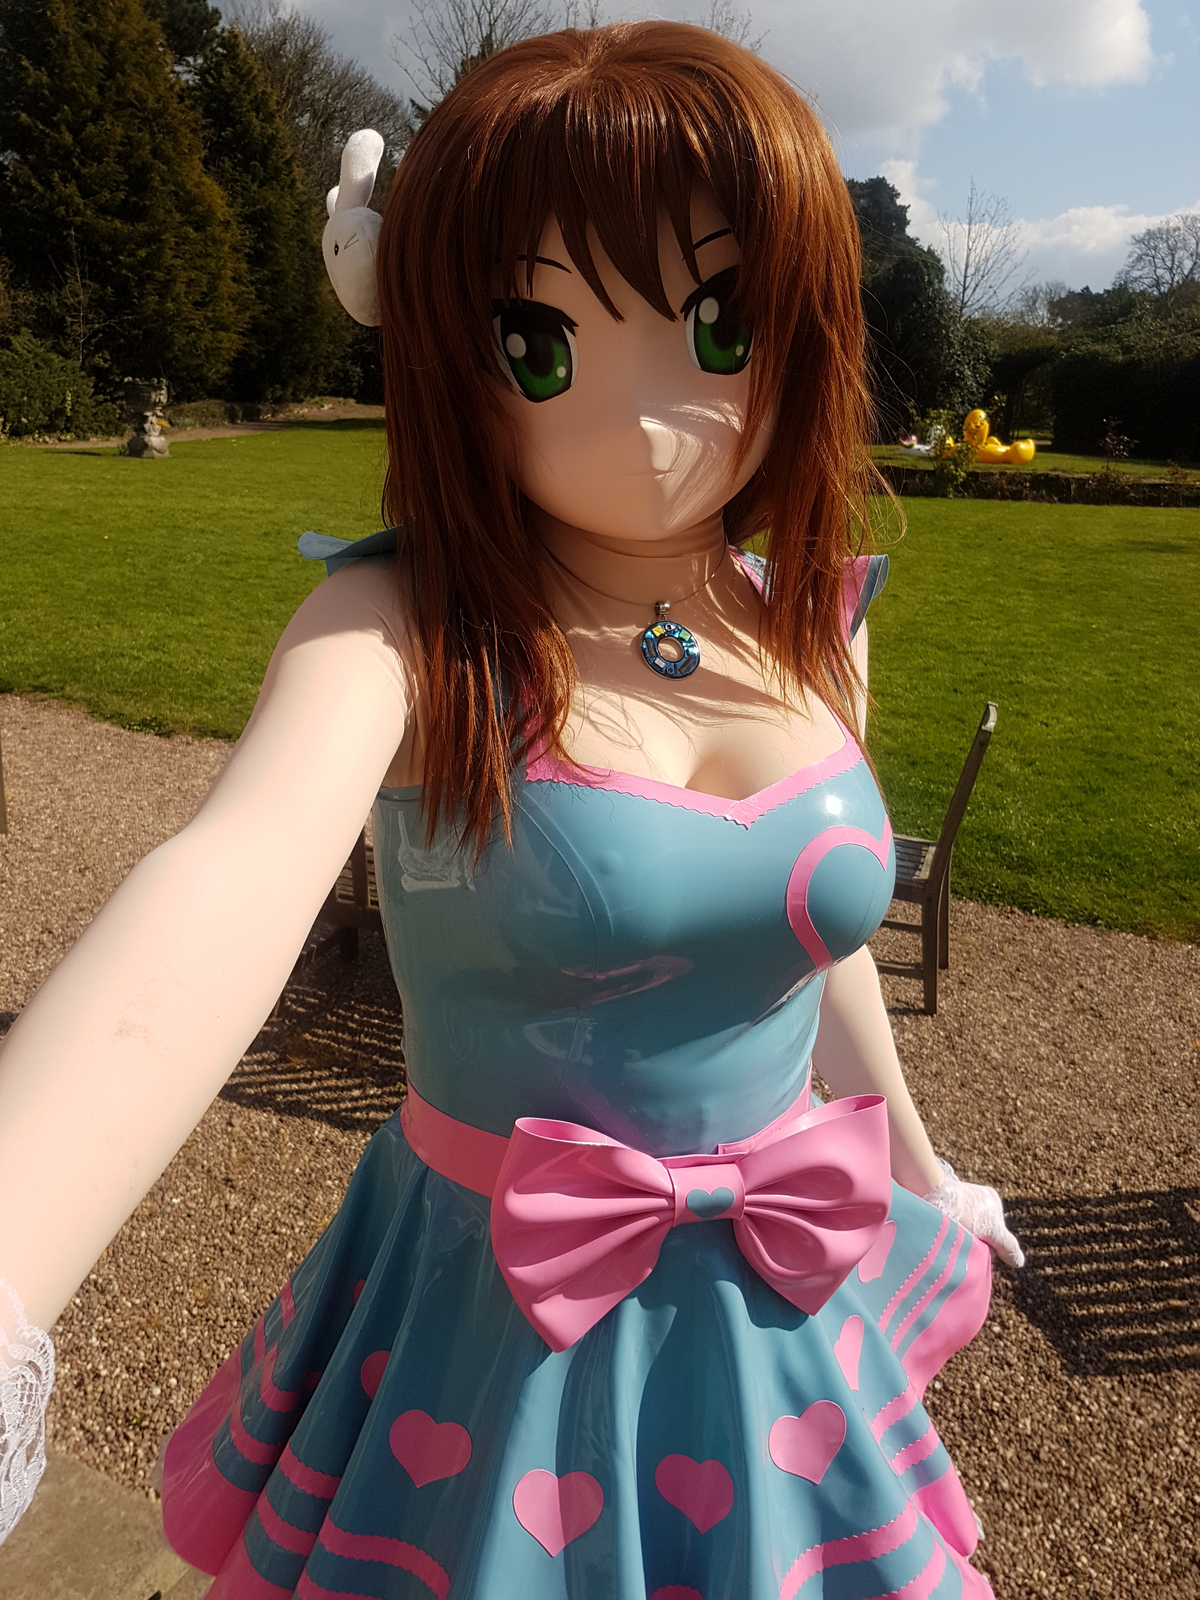
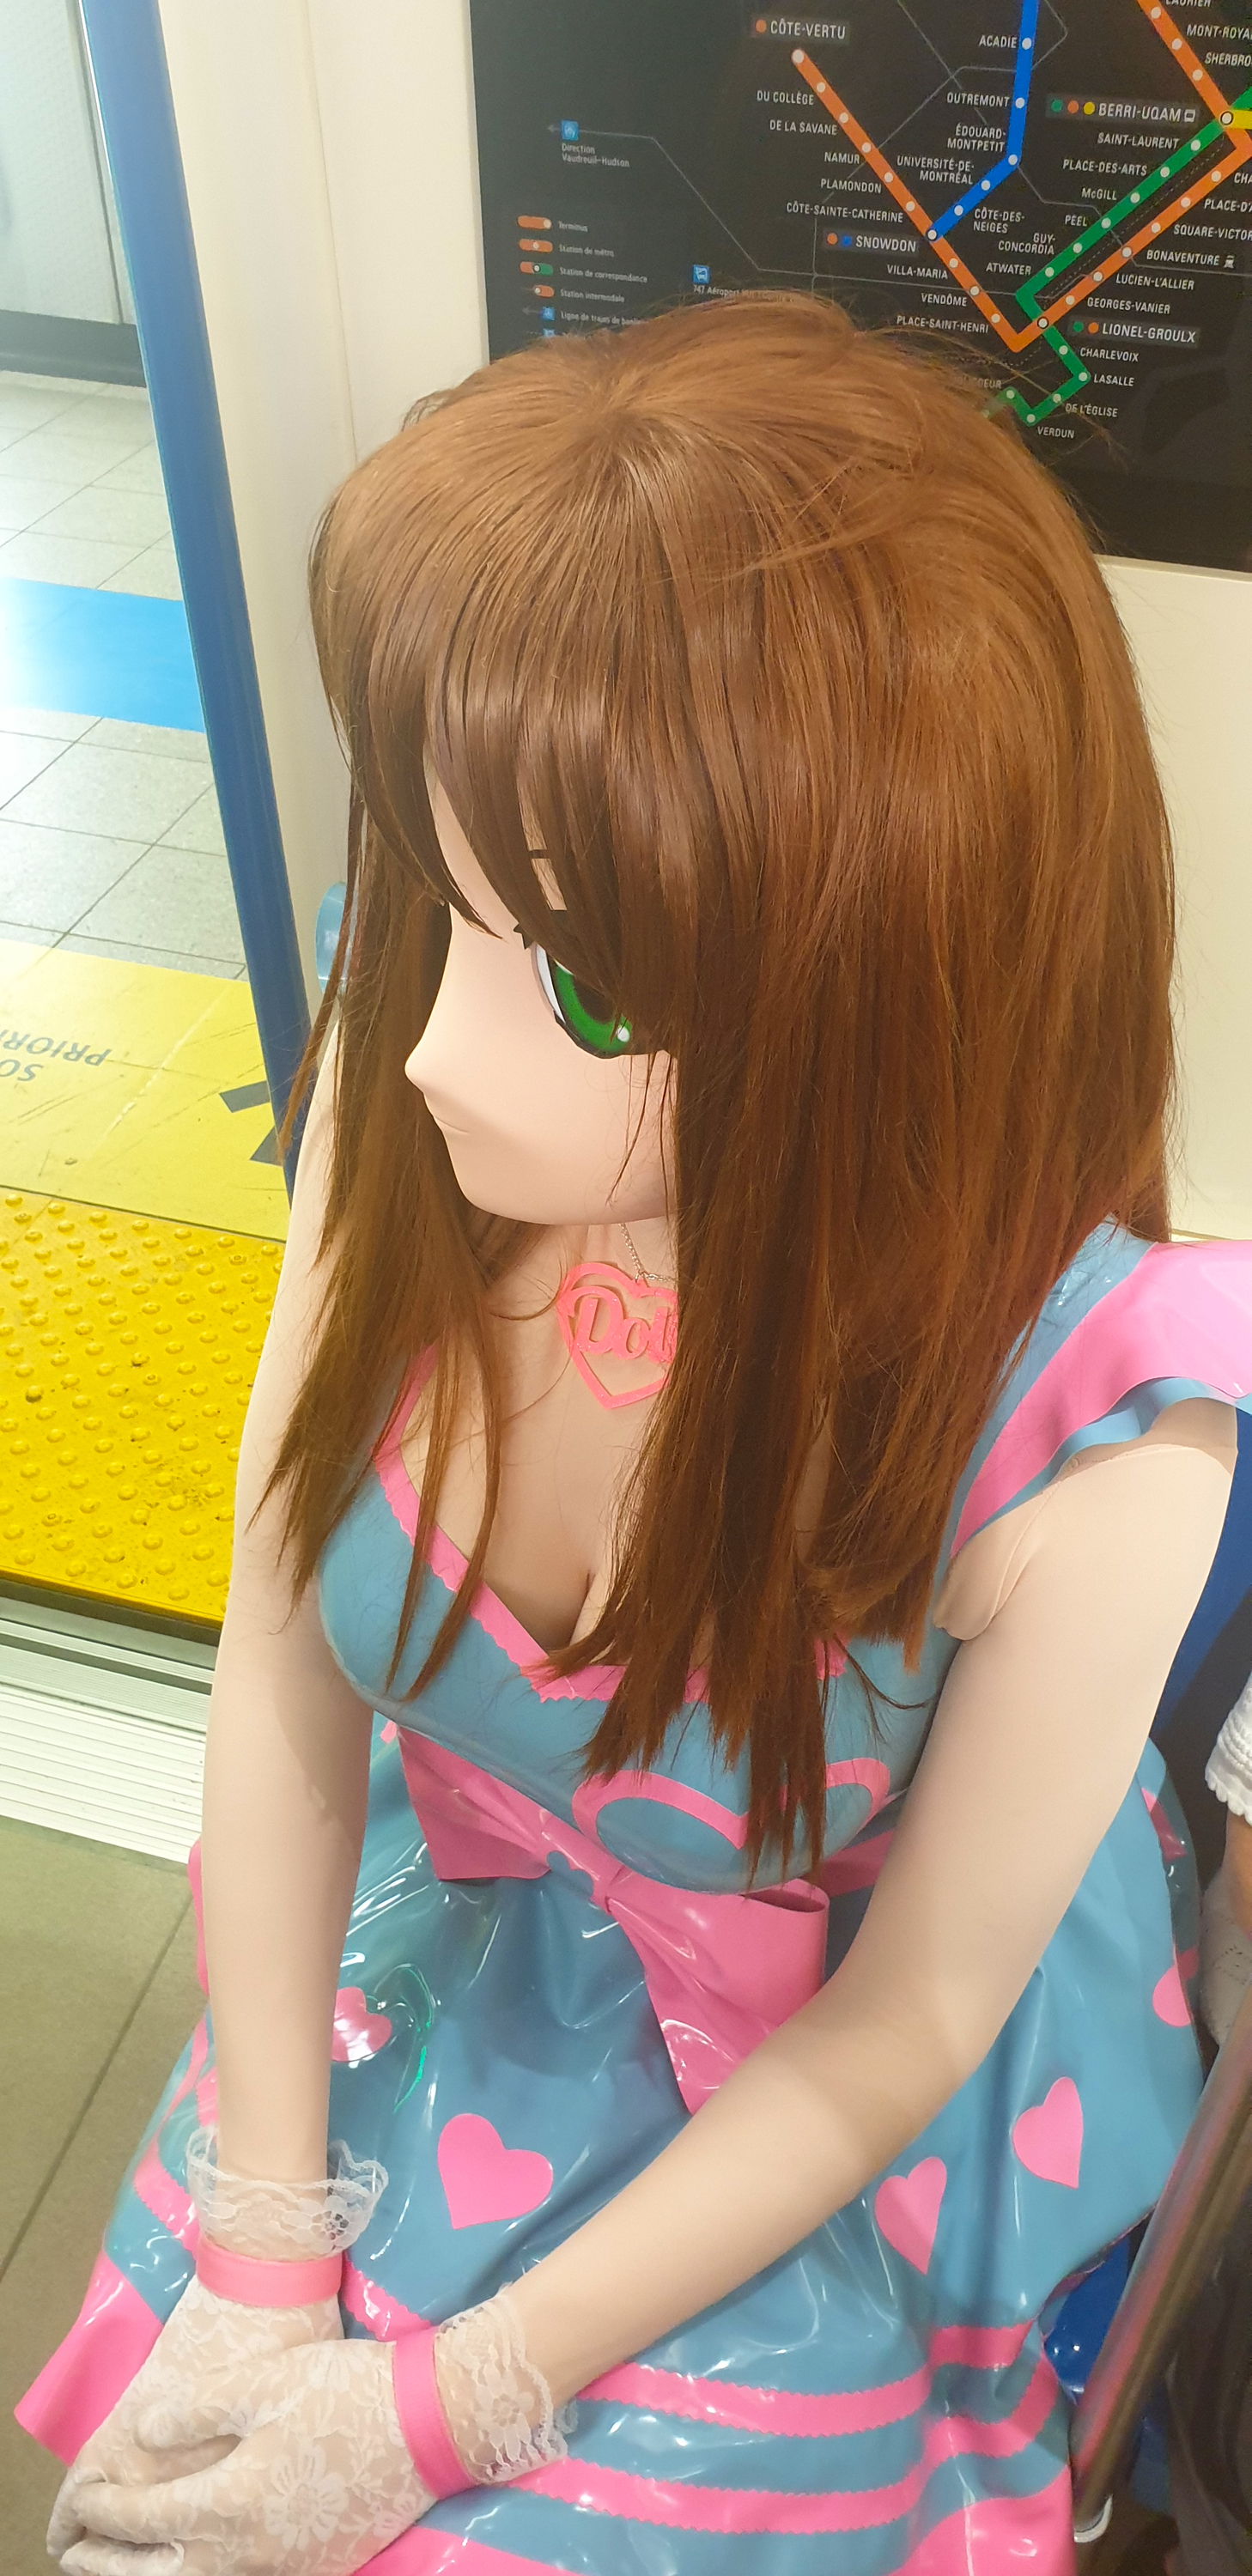
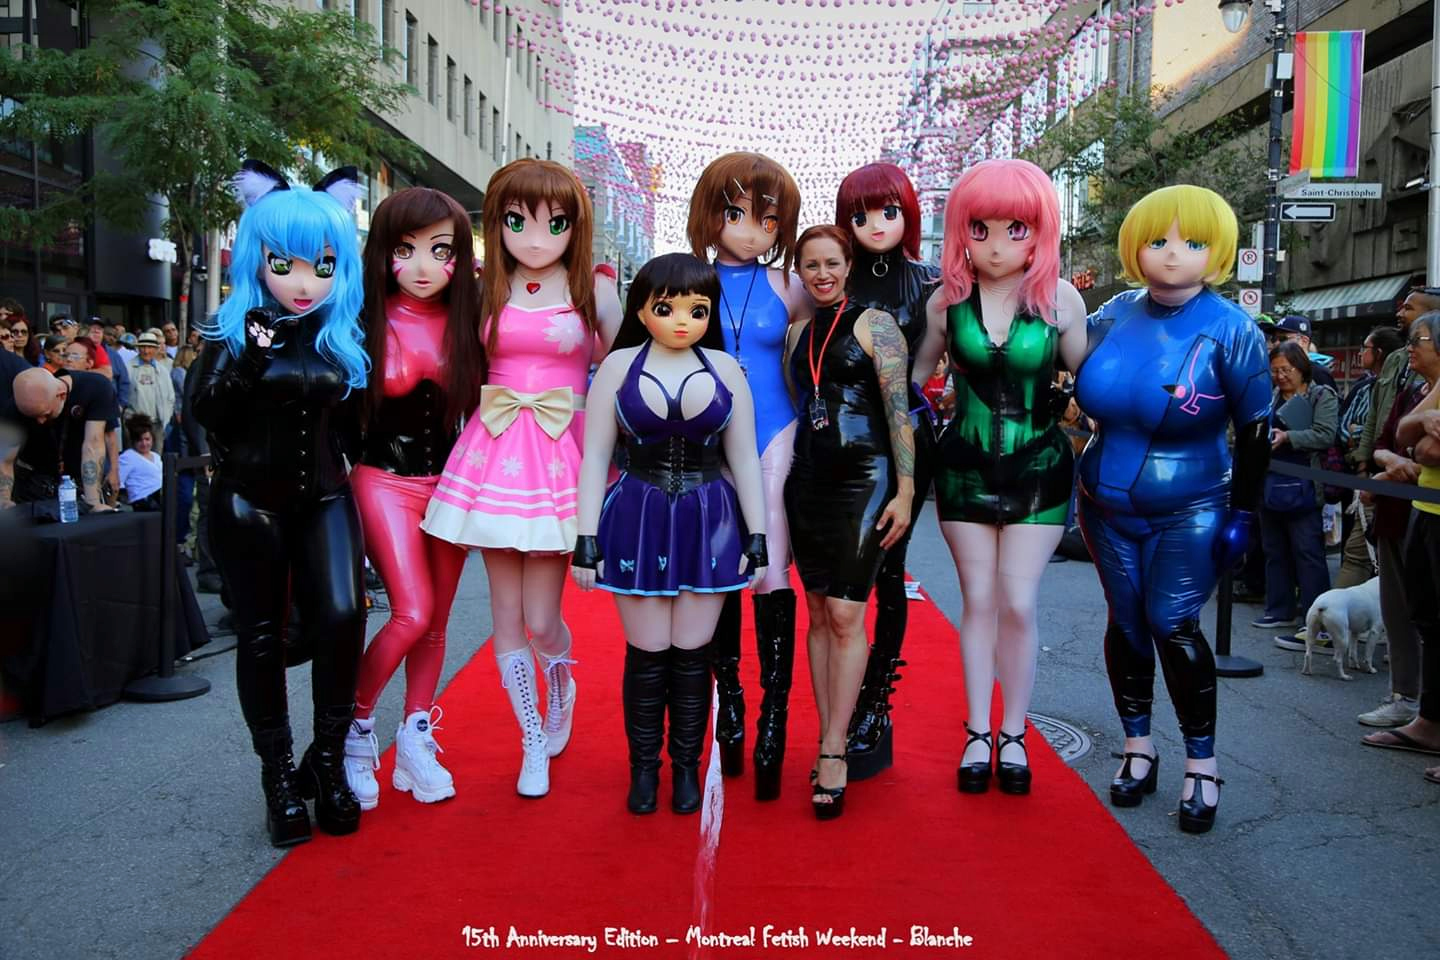
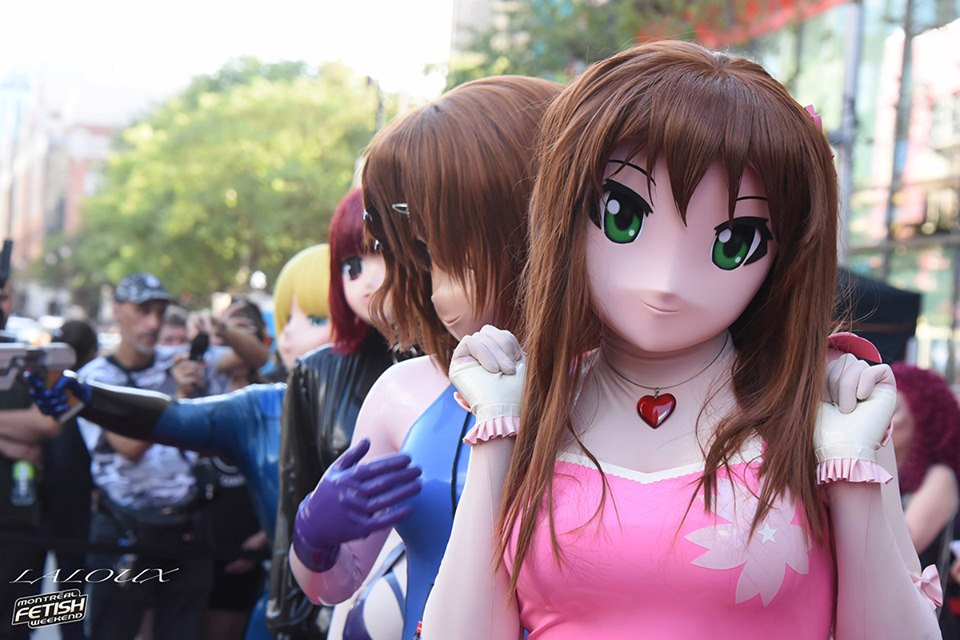
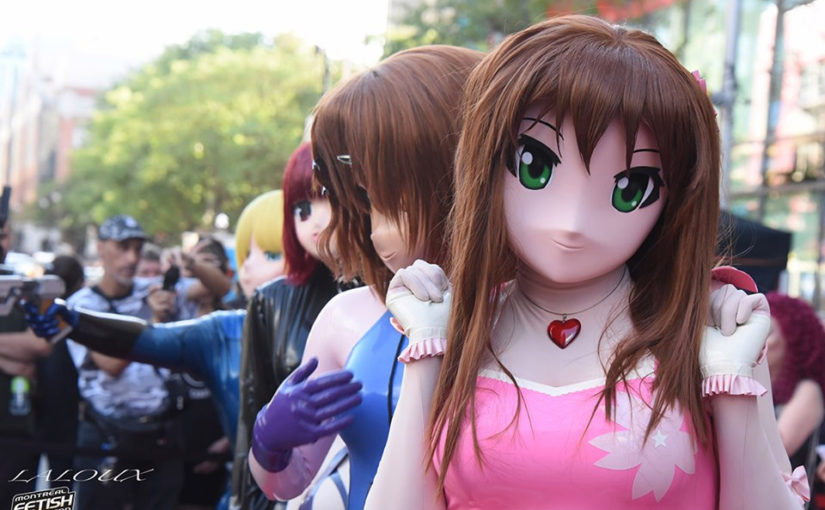
Next off to Montreal for Montreal Fetish Weekend for a week of fun events kigging with some old and new friends. I wore my new Sakura themed pink dress and we walked the fashion show catwalk. I was a little nervous and so ended up forgetting all my practiced walk. We also took a walk around Montreal, taking the Metro into the centre. We surprised the locals and tourists with a few hundred people in the most amazing latex and fetish outfits. For the main event I took the Sakura dress with LED skirt overlay to the dance party.
In the past I’ve experimented with 3D video and this year I bought a VR camera so we could make some kigu content for VR headsets. I published a few of these on YouTube (so if you have a VR headset like an Oculus or even a PSVR you can find the videos in YouTube and watch them). Most of them are stereo 180 3D VR (although a few are mono 360).
Autumn
Autumn started with another long latex weekend away in the country with Skye and another hotel for us to help run. I found
this vintage ambulance perfect for with my nurse outfit. I’m not sure why but everyone said they started feeling ill and in need of nurse attention.
Then in November the Glasgow Anime event, Raicon. I took my new lolita-style dress bought from Souffle Song and met
up with some old and new friends.
Winter
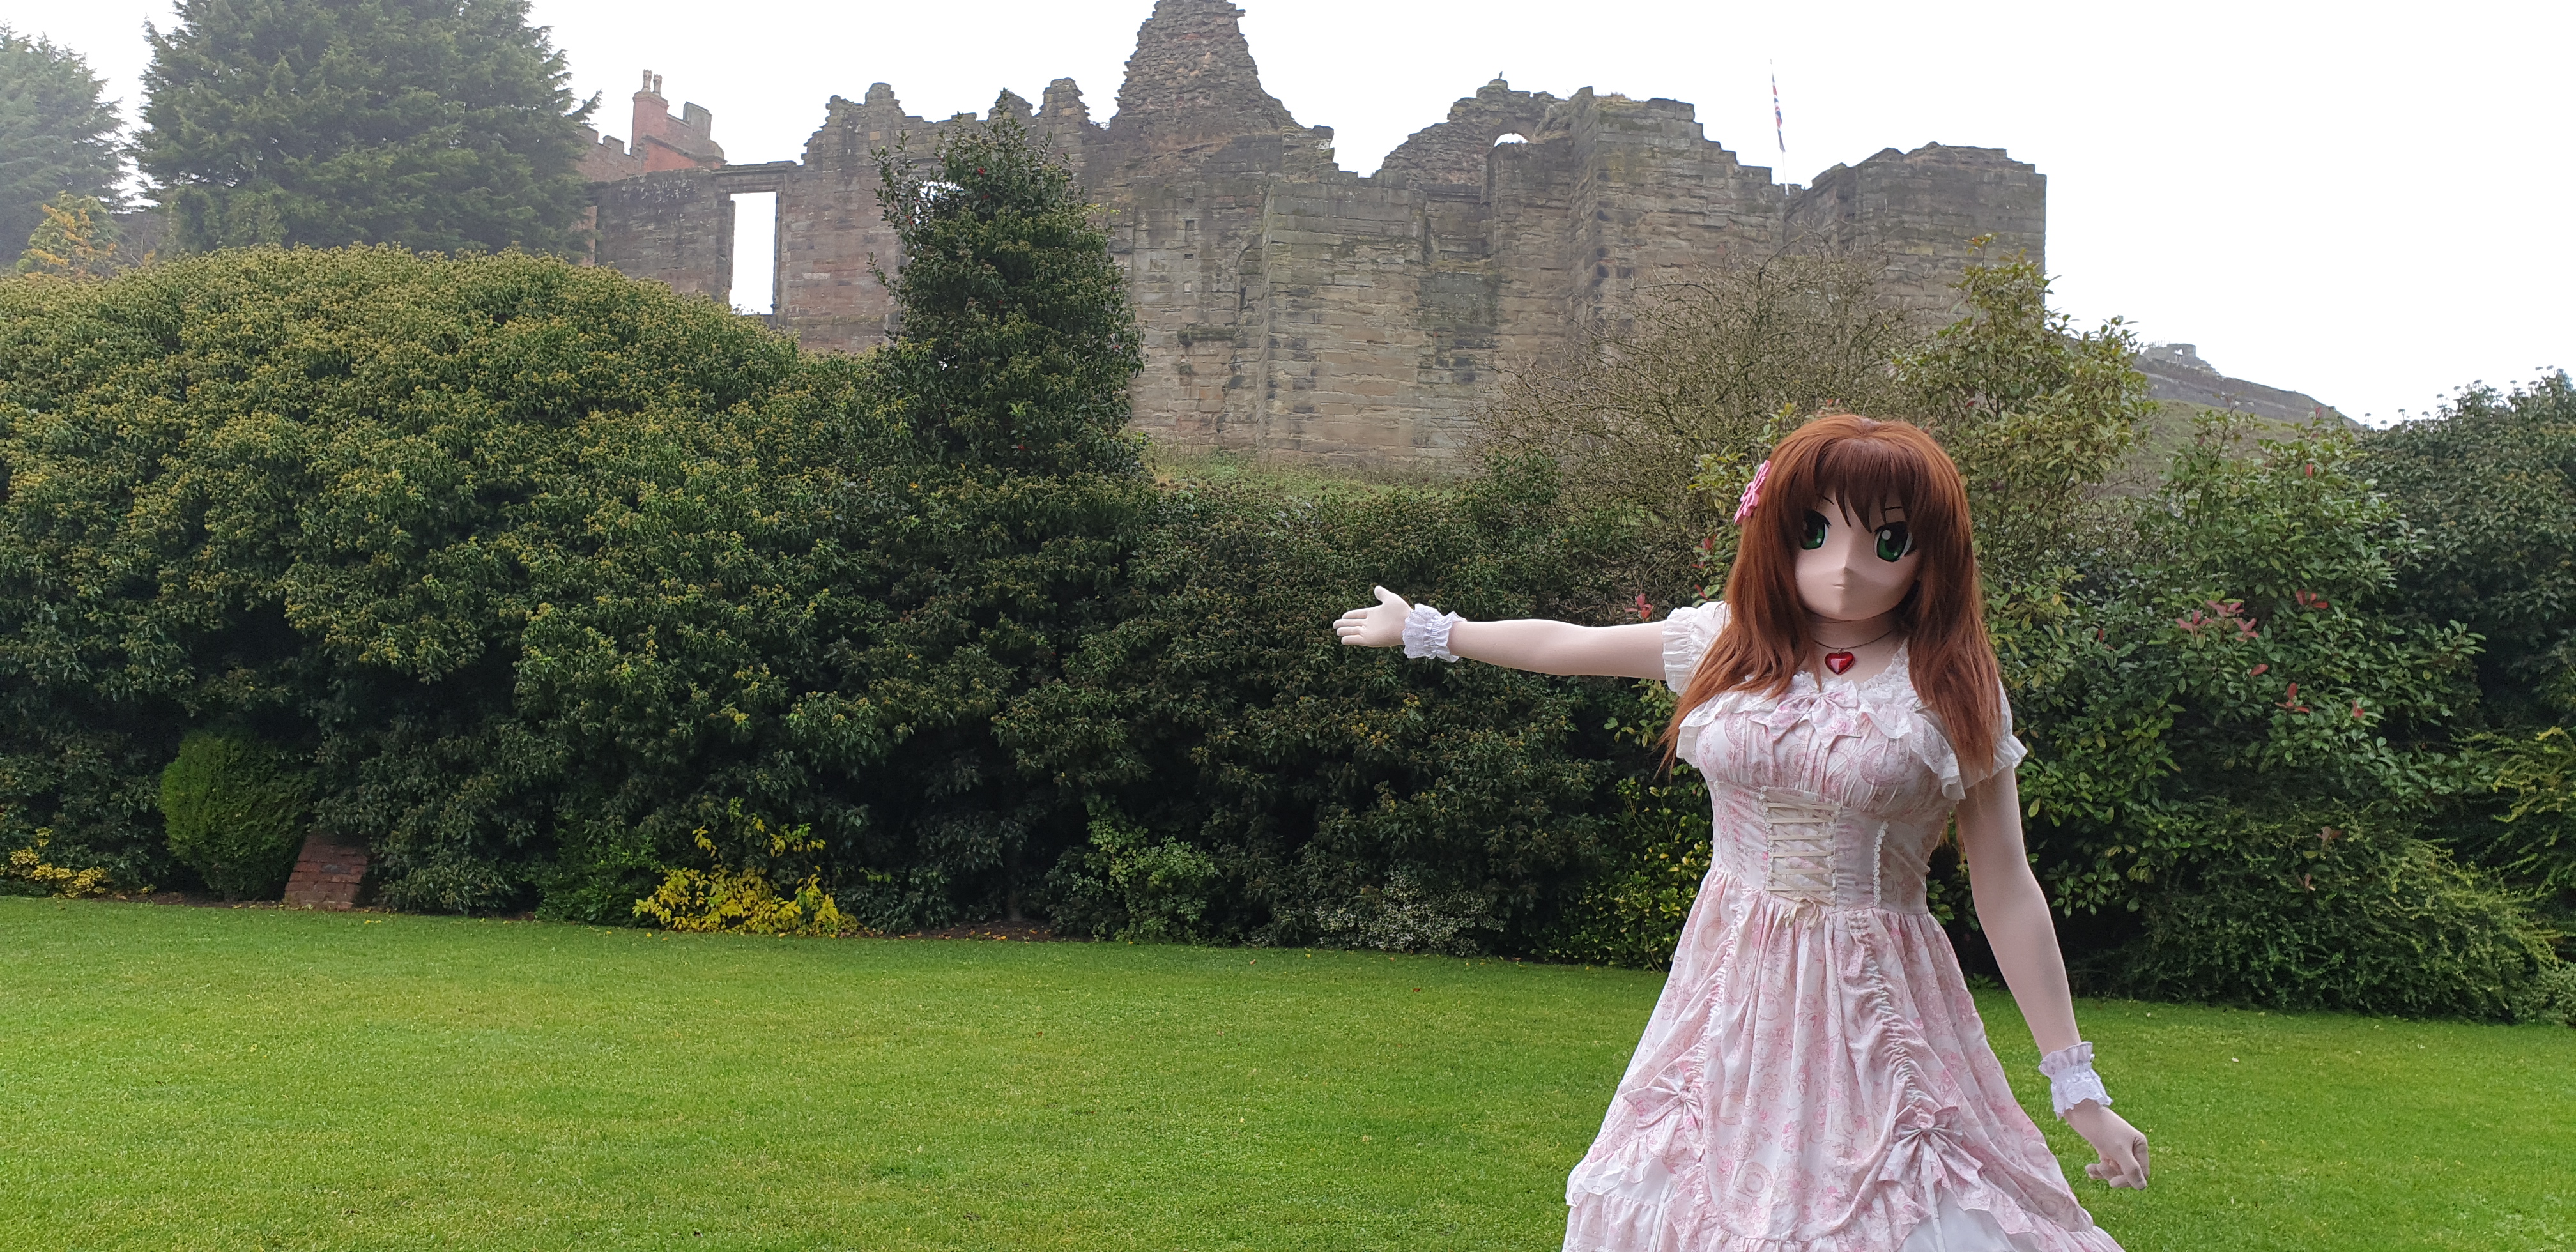
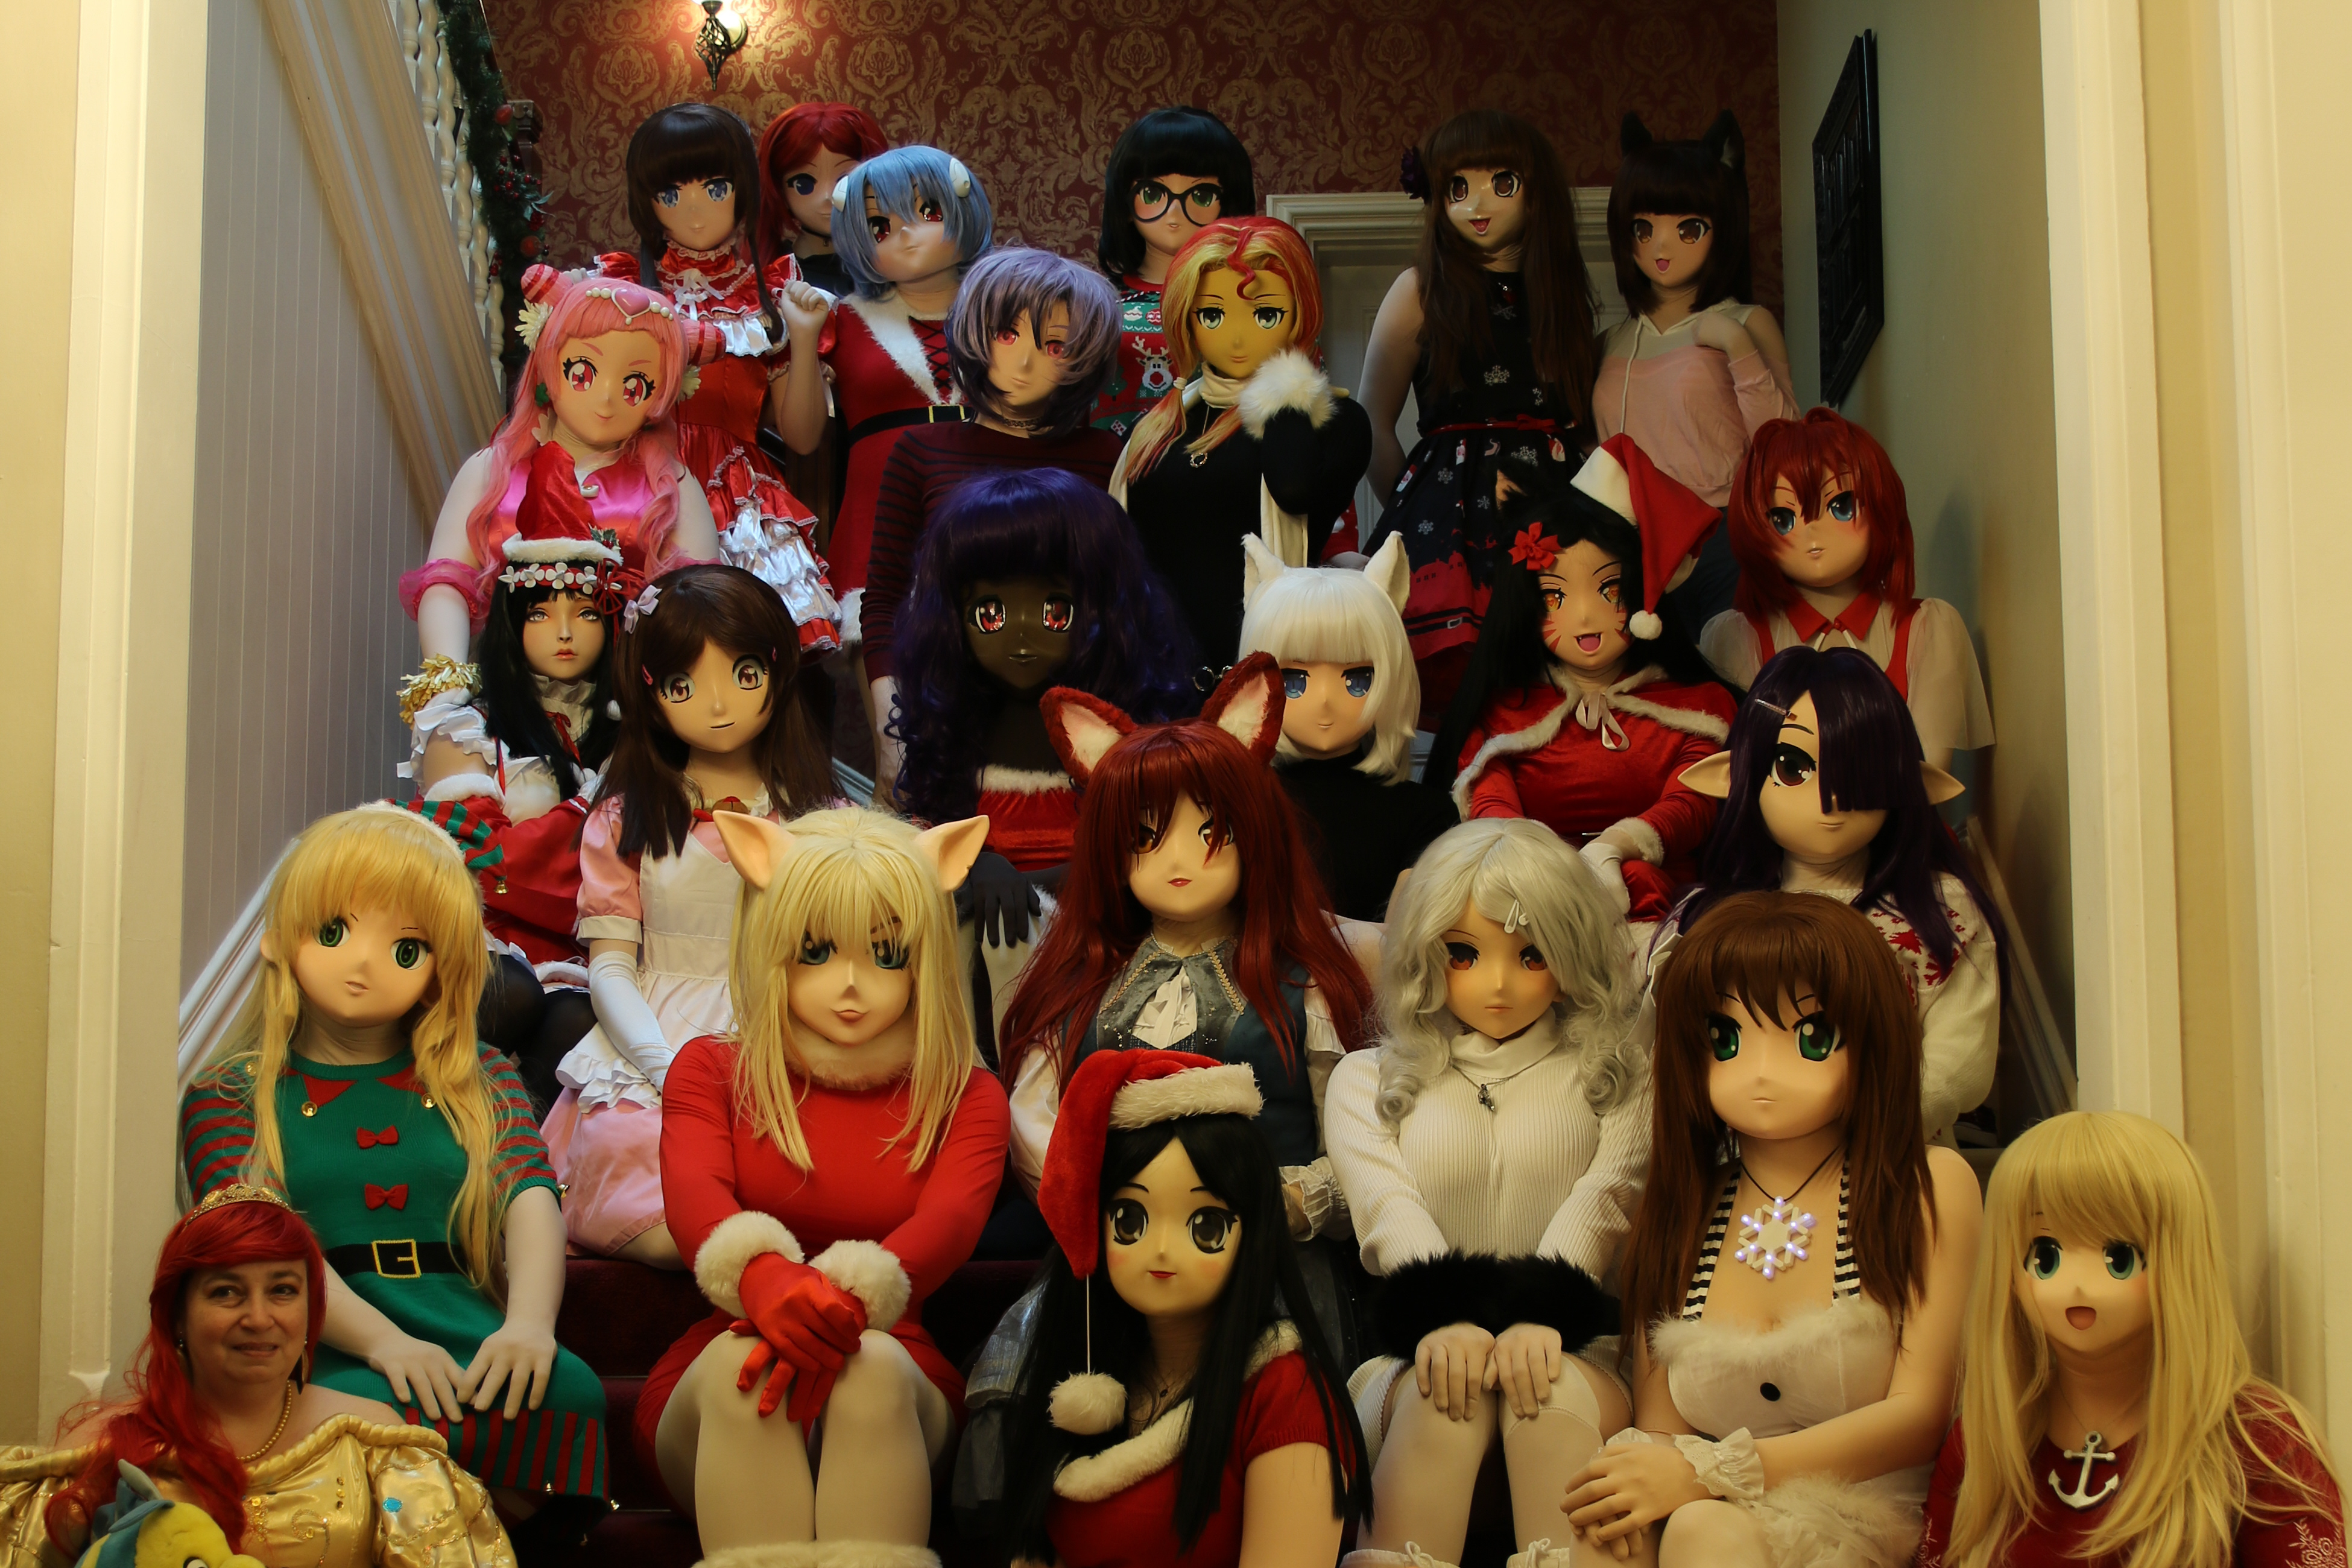
And, just like that, 2019 was nearly over. Just time to fit in a weekend event with a couple of dozen European kigus in Derbyshire. There were castles, weddings, fireworks, and even a mention of us in the local newspaper.
Not much streaming on cam this year, although I did a Christmas Day live present unwrapping to make up for it.
We hope 2019 was good to you too. We’ve lots of fun things planned for 2020 including some overseas events.
On behalf of both myself and Jade we wish you peace and prosperity for 2020.
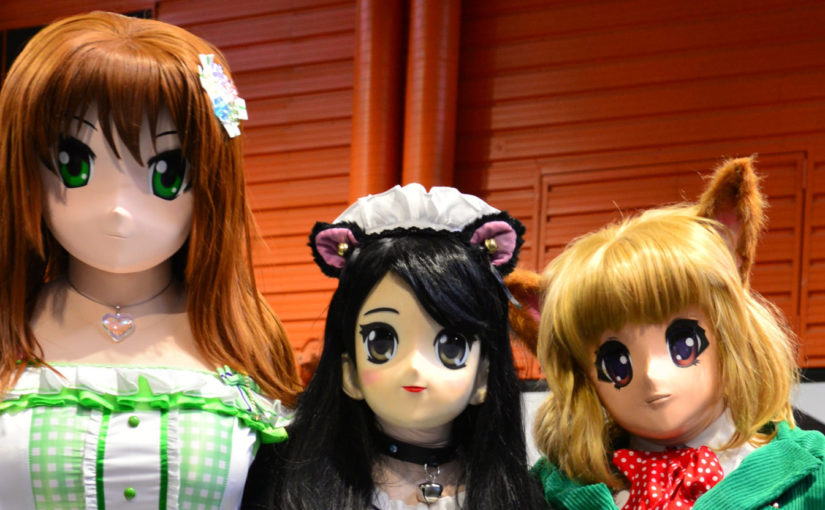
Photos in this post were taken by Natalie, Jade, Xelphie, Blanche, Keital, Cloud. Also many thanks to everyone else who took photos of me or was a handler.
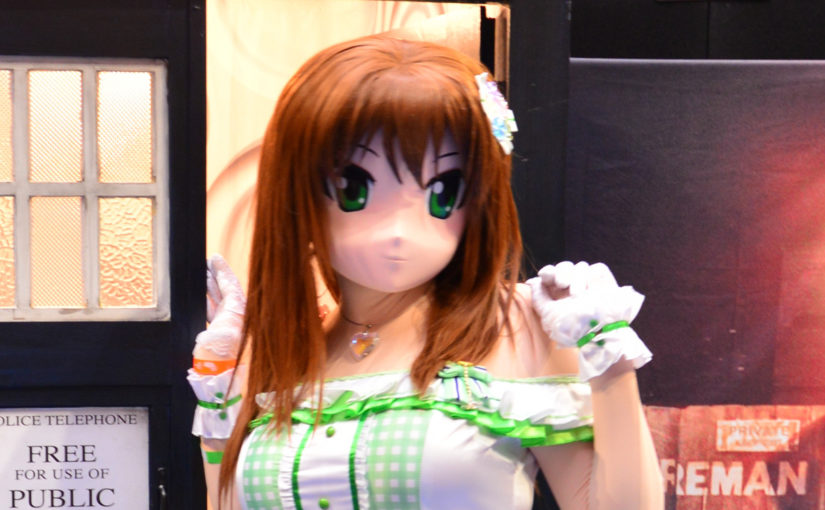
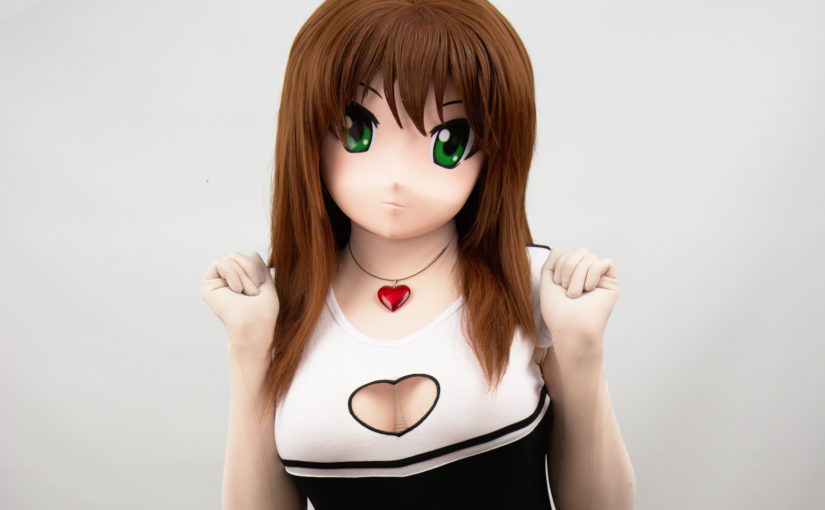
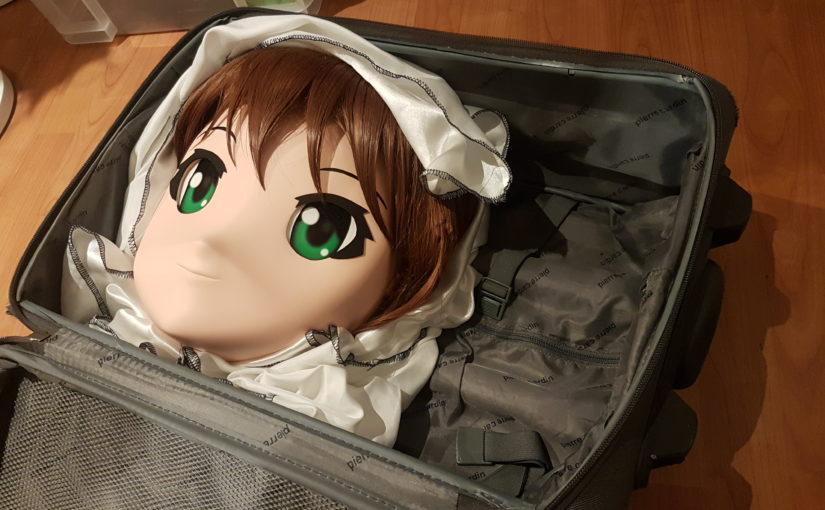
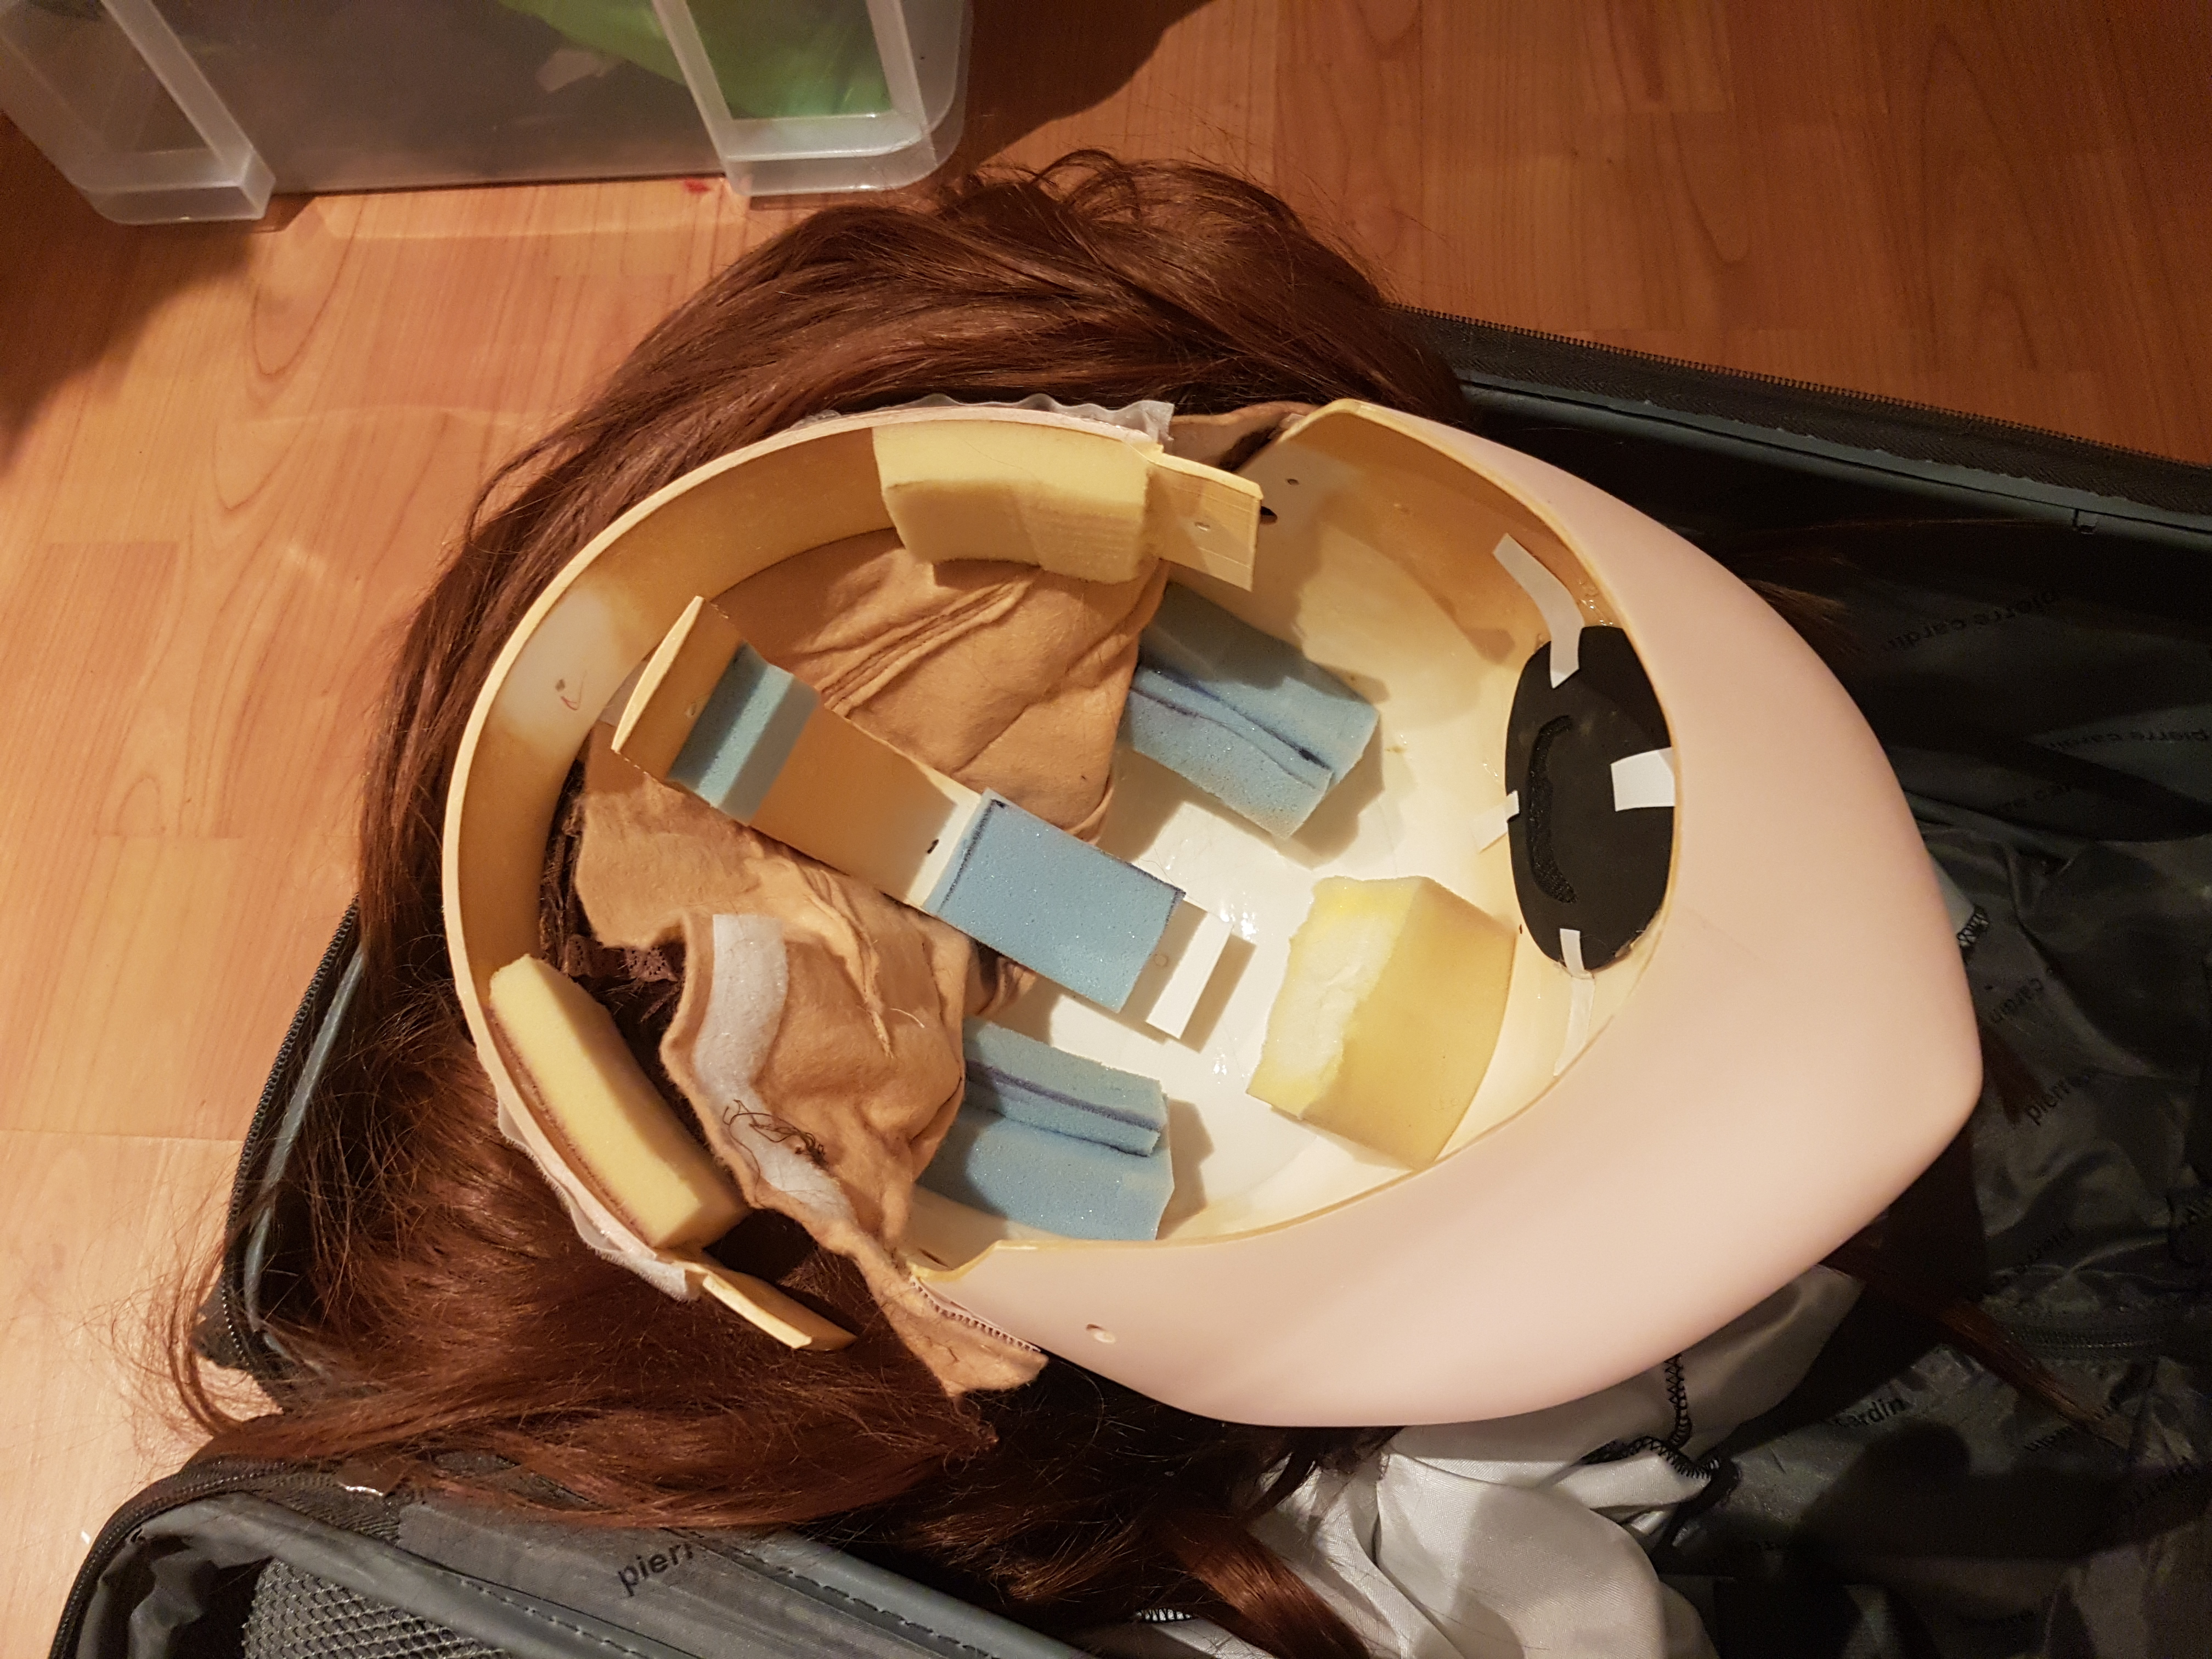
Last year I explained how to take a mask as big as Yui overseas, which involved getting her a protective drum case to herself that could go as checked-in luggage. But there are times when this is expensive, or where you want to be able to throw a mask into carry-on for a quick meet up.
Carry-on luggage restrictions are tough, with many airlines giving you a maximum width of just 25cm (or sometimes even 23cm). Yui was 28cm at a minimum and without any protective padding. I could have bought a half-mask or smaller mask, but people wanted to see Yui at the events.
So this project, travel-yui came into existence. Can I make a mask that looks pretty much like Yui (it’s okay for it be to slightly different, it’s a younger or older Yui from the past or the future), but that’s possible to kig with everything fitting into one carry-on airplane suitcase? And can I do it in time for the German latex ball? The rest of this post is the journey we took to make it happen.
Design
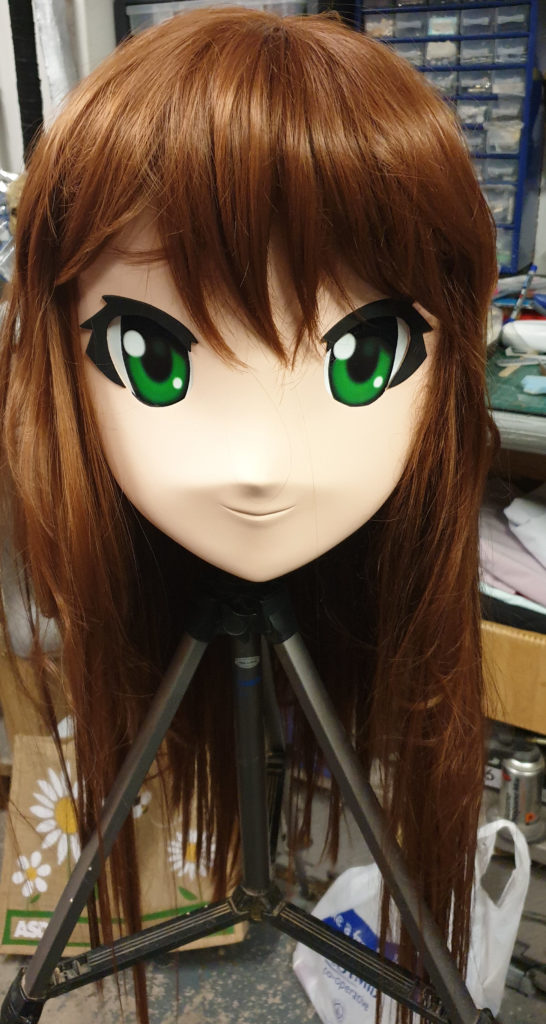
Step one is to make a 3D model of the final mask. I used Blender on Linux using photos of Yui as a reference and made a 3D mask. Blender has a (very) steep learning curve, and it took me a full week from having no Blender knowledge to having the final object. Getting things like the eye shape, width, height, and positioning were the hardest but most important to make this model look good.
It’s worth noting here that “copying” a mask brings up all sorts of concerns, from copyright to ethics. I could have, for example, just used a 3D scan of the original Yui mask, but although this would have been far easier I decided to design it in Blender myself but using Yui as the reference. The company that made Yui is no longer operating, but I did also check with the people behind it and who made Yui originally to make sure it was okay with them to do this as a personal project before I went ahead.
I made the design as a usual 3/4 mask design but then removing the back panel and then adding in some cross supports. The supports can be easily added and removed using screws. I planned to print the ears separately and add them on at the end, but ran out of time (and you rarely see original Yui’s ears anyway).
Printing
I got printing inspiration from both Helenako and Bluegail, who had printed their own masks and not only made them available but also given lots of details of the build process. Since Helenako even had the same printer (CR-10) and filament (Prima Value White PLA) it gave me confidence it would all work out. They also had some great tips on smoothing prints and using wood filler on the outside and cheap epoxy on the inside. In hindsight we’d probably not use wood filler again because it got very messy and is really tricky to wet sand. But more on that later.
I printed the front section in three pieces to eliminate overhang and too much support material, using Cura 4.0 for slicing in .28mm layer height but using the adaptive layers function so areas like the nose would be down to .1mm in places. The first print failed so for stability printed the next one upside down (although I did forget to rotate the model so the Z seam ended up on the face of the model rather than the back, oops, more sanding needed!). Total print time was about 20 hours for the main piece, under 2 days for everything. So we now have a crown, a chin, and a main piece, and two back pieces.
Finishing
After printing, I passed the prints off to Jade for finishing. She noticed the chin on my model had ended up being too smooth once printed so she used putty to sculpt a more pronounced one. The next steps of sanding, filling, sanding, priming with filler primer, sanding, filling, sanding, sanding, sanding took her quite some time, a few hours a day over a week. But the end result is super smooth and flawless and the print lines are completely invisible.
Painting was next, using standard car paint acrylic in a custom kigu colour, then a matt clearcoat normally used for minature models. The clearcoat really helps the mask have a non-shiny finish. We already had a spare set of Yui eyes, so just reused these to save some time (even though the eye openings were not exactly the same size).
Hair was next, we made a removable wig cap out of felt (next time we’d use something that doesn’t stretch and break as easily), then sewed the wigs to it. Bits of foam were added to the wig cap to get the hair to sit right (next time this could be built into the 3d model). Styling the hair took a few hours, and we ended up adding more wefts to the side, straightening, thinning, and cutting again after the first outing.
I’m really very happy with the result. There are a few things with the design I’d tweak for printing another mask (I think the mouth ended up a little high, the chin and nose should be slightly more pointy) but these are easy enough to change for next time.
Thoughts
I didn’t expect the mask to be durable, it’s a PLA 3D print, so it will probably crack or break if dropped and melt if it gets too hot. But it suprised me how it’s held up — travel-yui has made a return trip to Germany, a trip to Montreal, and been in a hot car boot in 45C weather in Arizona and survived without incident so far! And I can always reuse the wig and print another one. Although Jade might not be so enthusiastic for another week of sanding.
Off to Montreal for Montreal Fetish Weekend, but it was more like a whole week of fun events. I got to kig with some old and new friends.
I wore my new Sakura themed pink dress and we walked the fashion show catwalk. I was a little nervous and so ended up forgetting all my practiced walk and did a really quick cat”run” instead.
We took a walk around Montreal, taking the Metro station into the centre. I think we suprised the locals and tourists with a few hundred people in the most amazing latex and fetish outfits. I really enjoyed the walk, it was a nice day with a gentle breeze and everyone wanted to stop us for photographs. I wore my blue kawaii latex dress for the walk.
For the main event I took the Sakura dress with LED skirt overlay to the dance party. We arrived early and quickly headed to the dancefloor where we danced the night away. When we went outside to cool off we met some latex models including Biana.
I really enjoyed my time in Montreal, the people were so friendly, and I’d love to go back some day.
Photos: Jade Tatsuko, laloux, Akari, Blanche. Dress original design by Black Sheep Latex